
TinyML by Edge Impulse
Imagine wanting to sense when a certain gesture occurs on a microcontroller. Normally, this would be accomplished by gathering training data from a sensor, labeling it, and then using a script to train a model and then deploy it. This workflow takes a lot of time and can be very daunting to beginners.
TinyML is a service by Edge impulse that allows for the easy creation of these models by simply connecting a microcontroller to their service, clicking a button, and then deploying it after their servers do the heavy lifting. Their drag-and-drop interface makes it a breeze to add more sensors or learning capabilities.
Potential Applications
As alluded to before, Edge Impulse’s TinyML is great for quickly creating projects that rely on large amounts of data to detect and/or predict when events will occur or are occurring. A great example of this is hotword recognition, where a device can be set up that listens for a specific phrase and then performs an action based on it, such as "open blinds" or "lights on." Another great use for the platform is motion recognition, such as a way to count steps or check if an item is currently being used.
Setting Up an Account
To begin, first create an account by going to https://studio.edgeimpulse.com/signup.
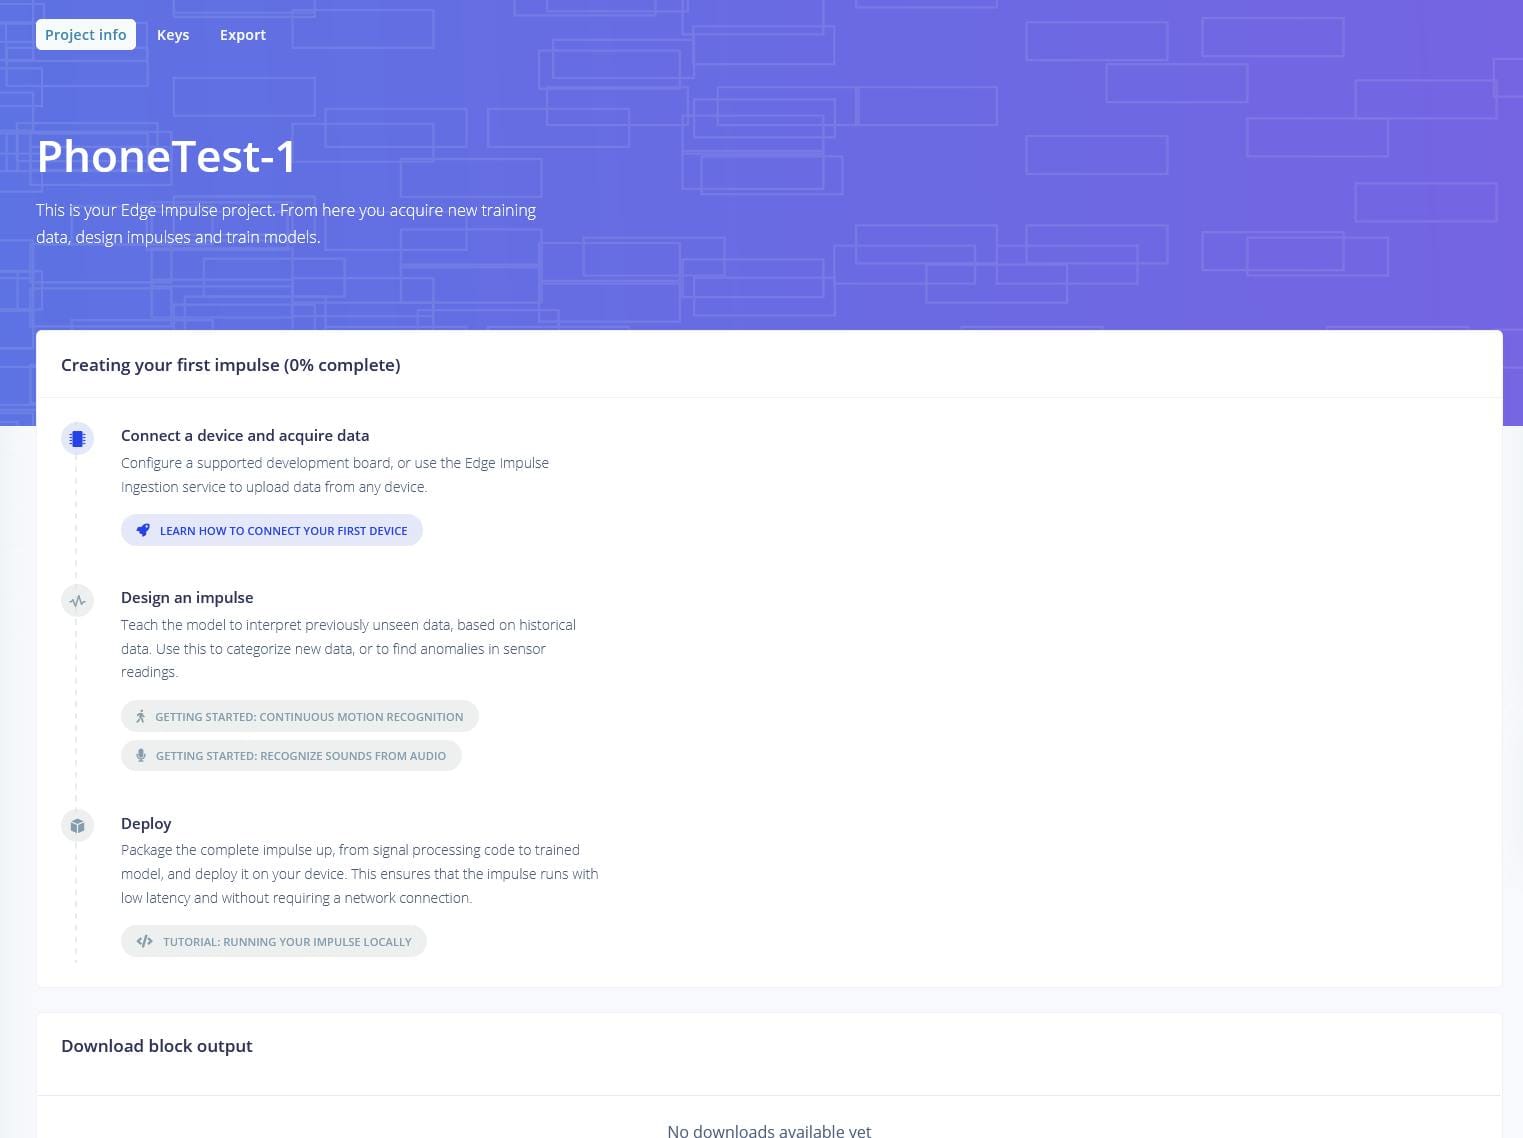
After entering in your information and verifying your email, you will be greeted by a getting started page. This will walk you through the process of connecting a device, gathering data, and finally deploying a model. I named my first project PhoneTest-1, but it can be anything you like.
Connecting a Mobile Phone
TinyML supports many devices, including the ESP32, many ST ARM Cortex-M3 boards, and several Arduino WiFi-enabled kits. However, many of the same tasks can be accomplished simply by using a smartphone via a web browser, as it contains a microphone and accelerometer. To connect your phone, simply click on the "Use your mobile phone" button which opens up a QR code.
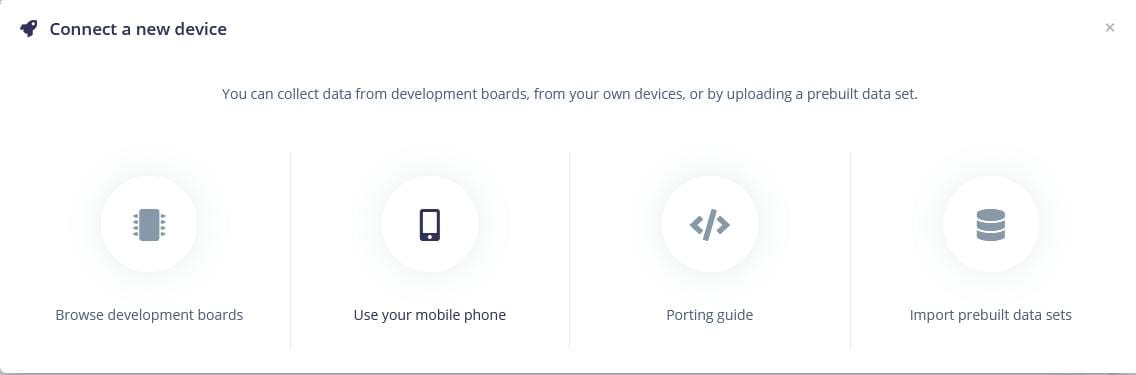
After scanning it, you will be taken to their website and automatically connected to their API via an API key. Make sure to keep your phone on and the browser window open throughout the rest of the guide.
Gathering Data
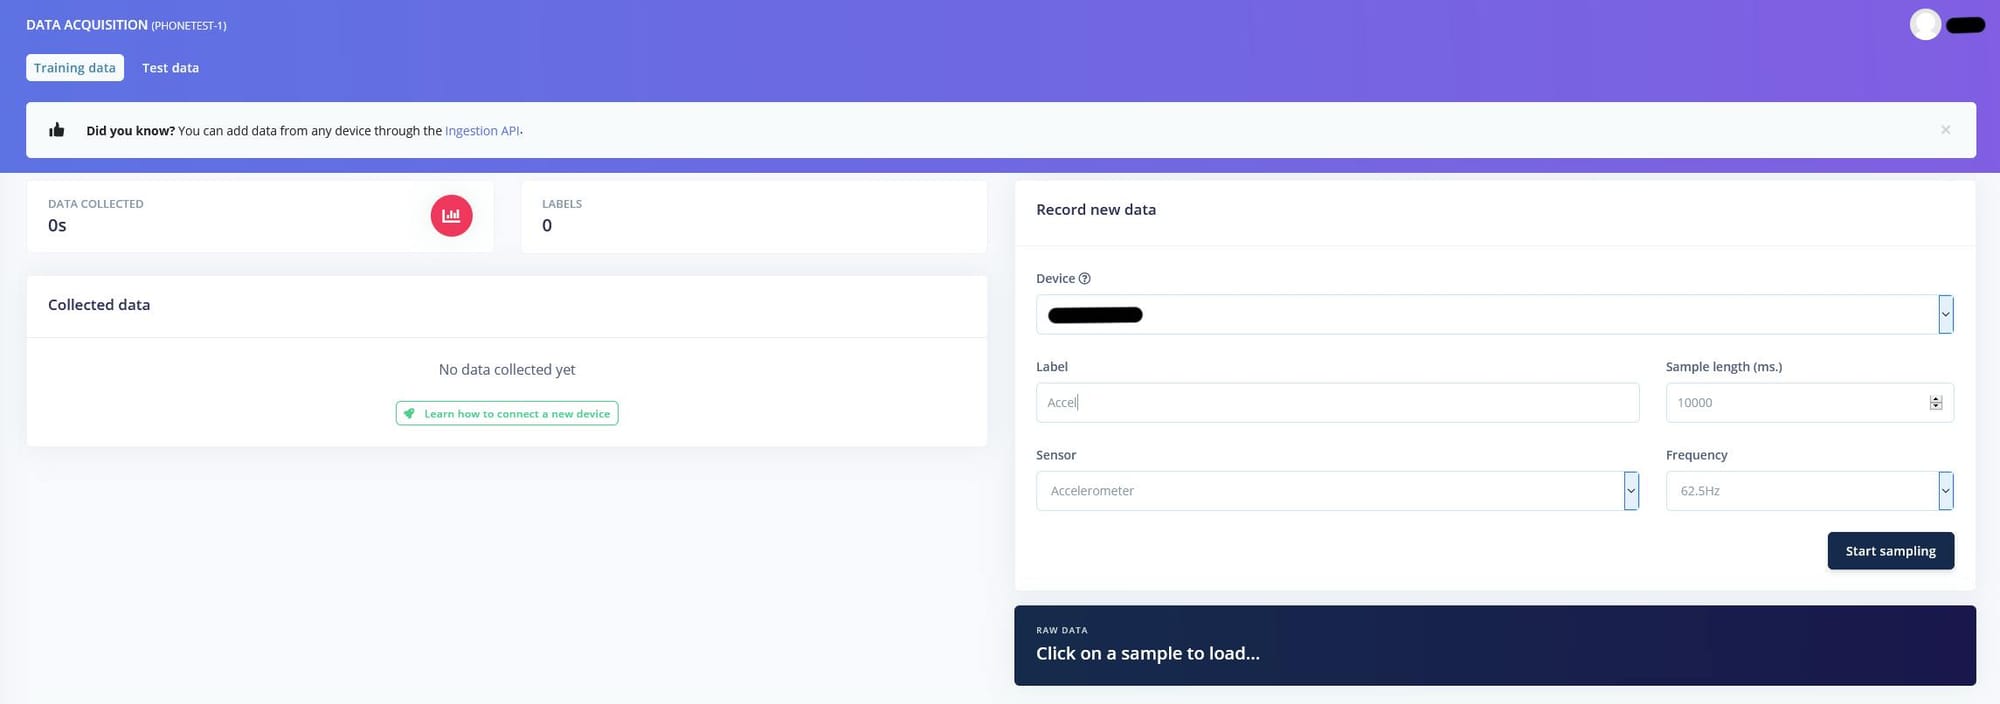
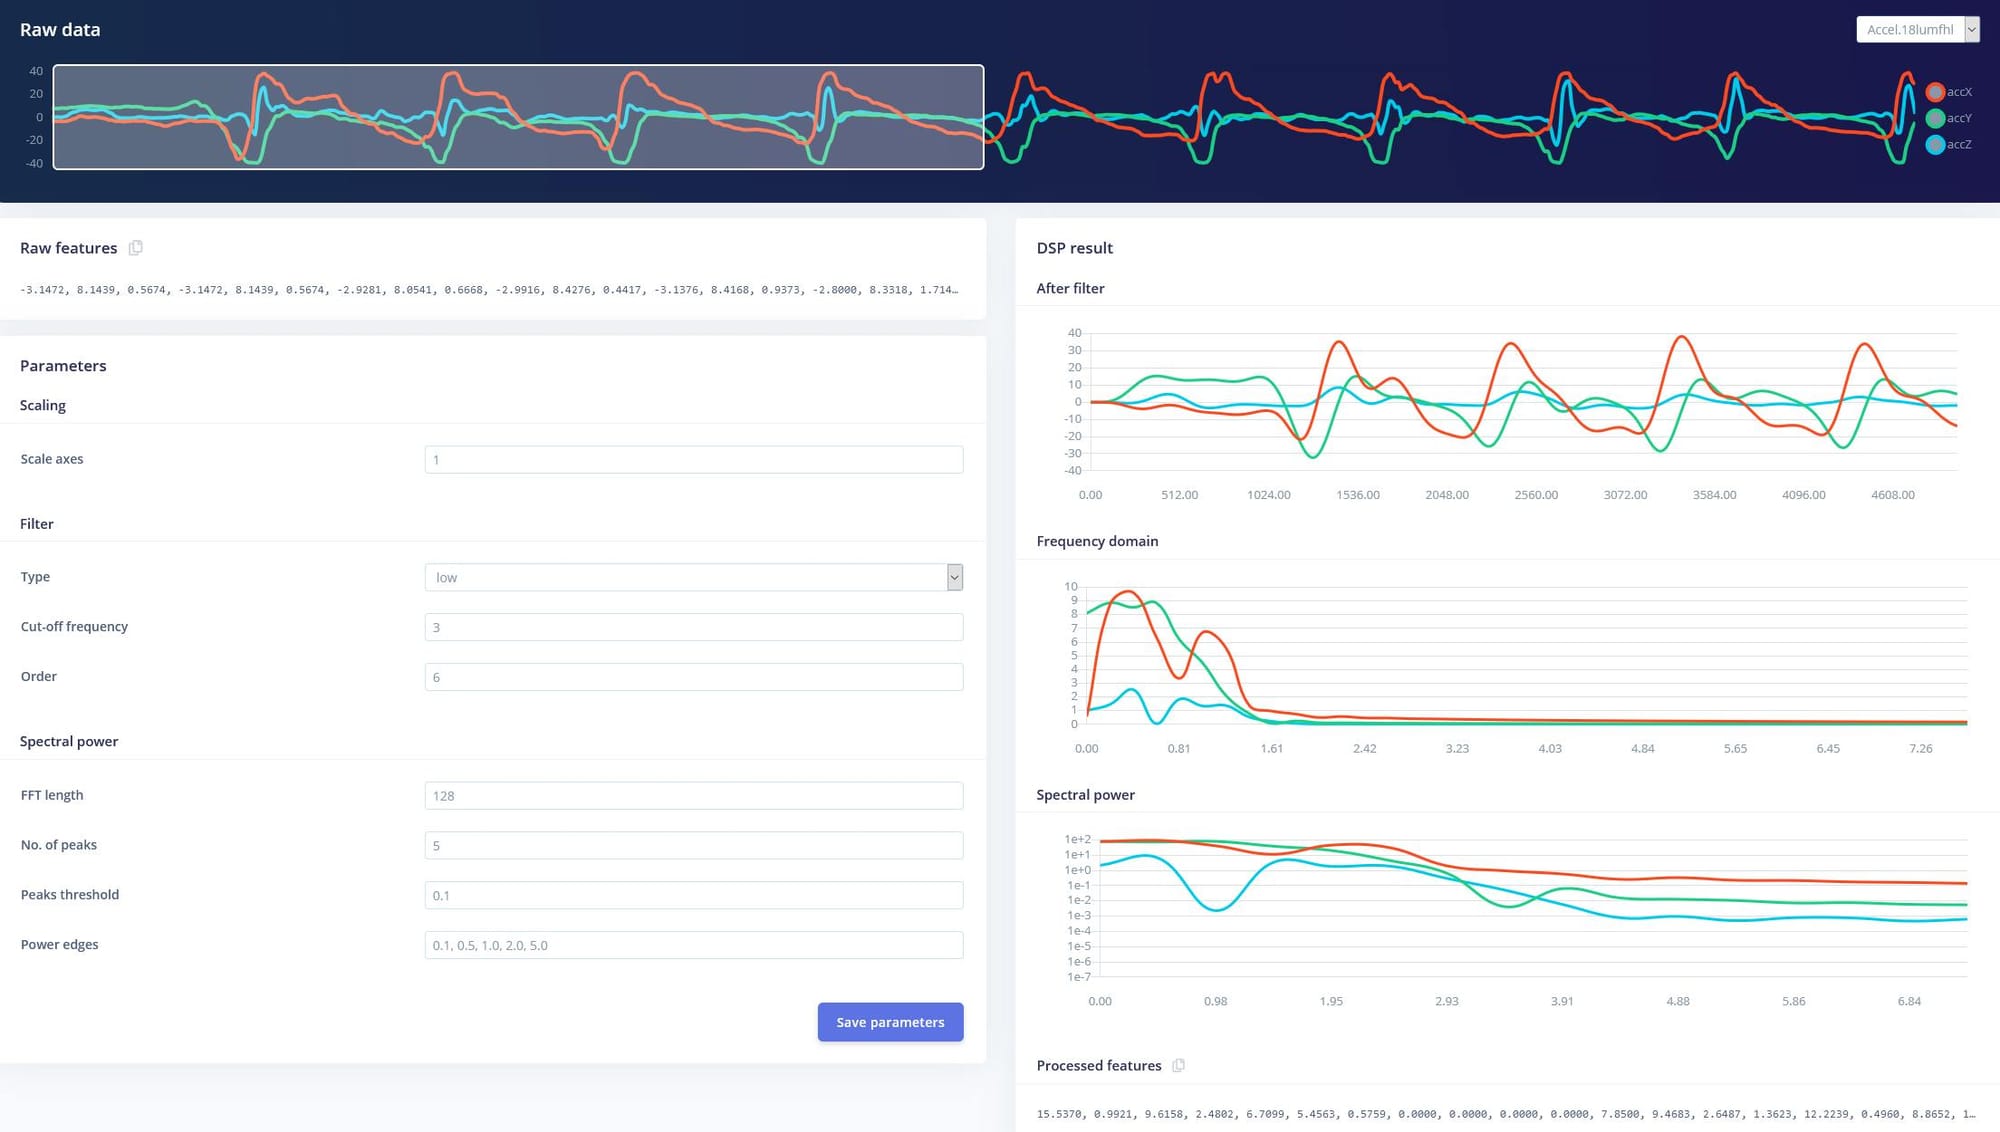
Now it’s time to really dive in and create a model. But first, there has to be data to train it on. Make sure you have your phone handy because you’ll be using its sensors to capture the data. To begin, go to the data acquisition tab and make sure your phone is selected. Choose the accelerometer sensor and frequency and then click "Start sampling." After you are done moving your phone, you can view the collected data in a graph.
Training a Model
Since you have some data recorded, it’s time to train a model from it. Go ahead and navigate to the "Create Impulse" page and select the recommended Spectral Analysis processing block and a Keras Neural Network learning block. Then go ahead and save the impulse.
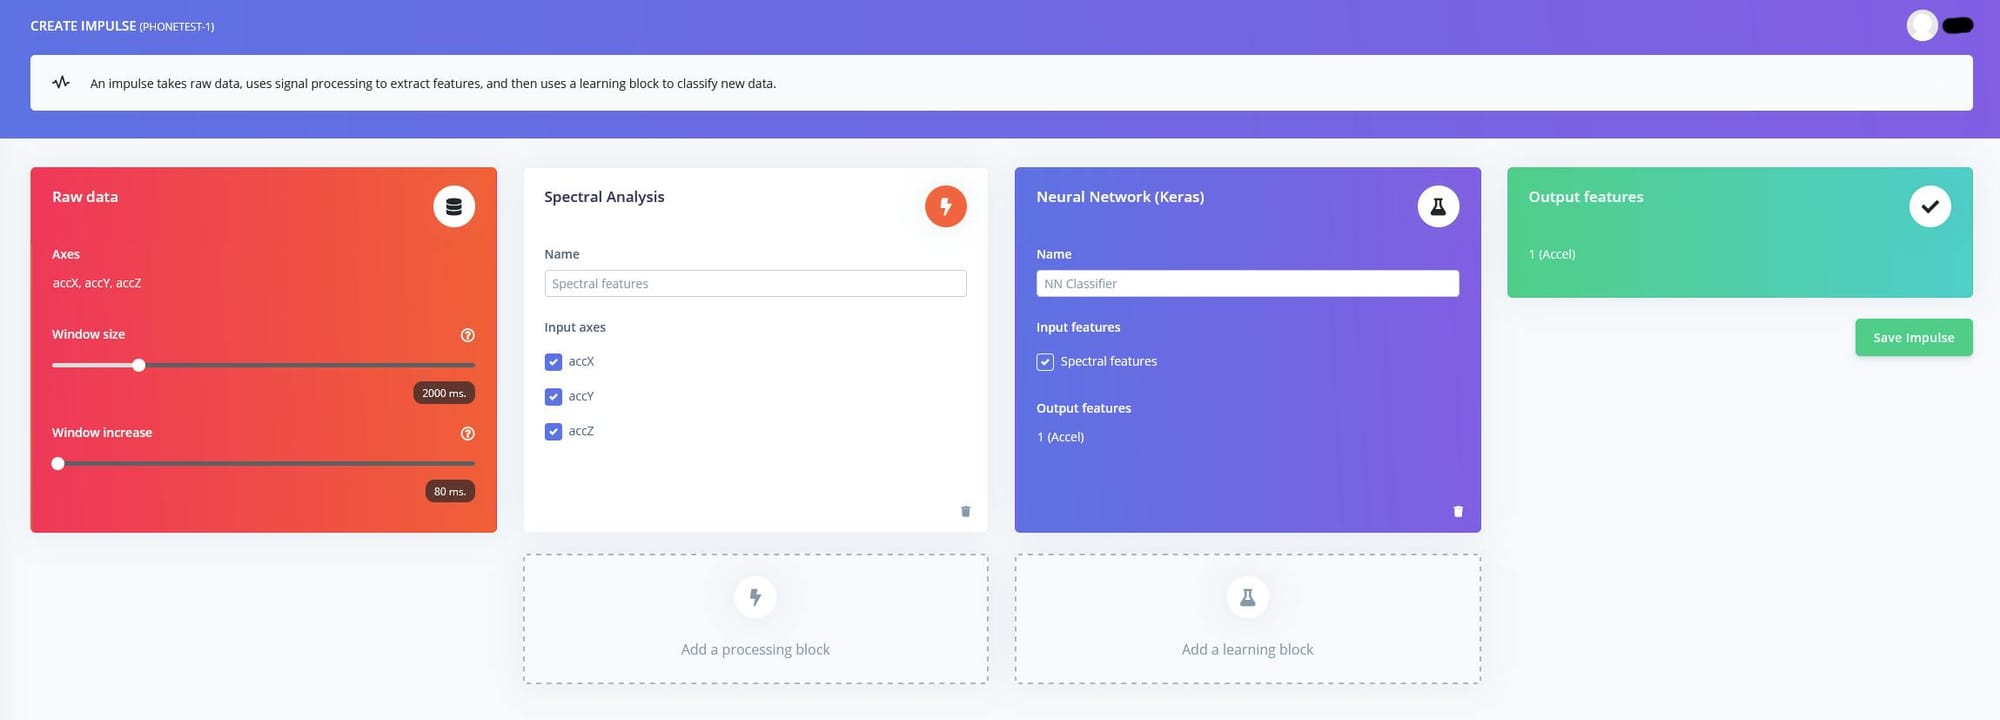
Next, set up your data’s scaling, filter, and FFT settings. These will control how your data gets pre-processed before being sent into the NN. After doing that, view and generate the features.
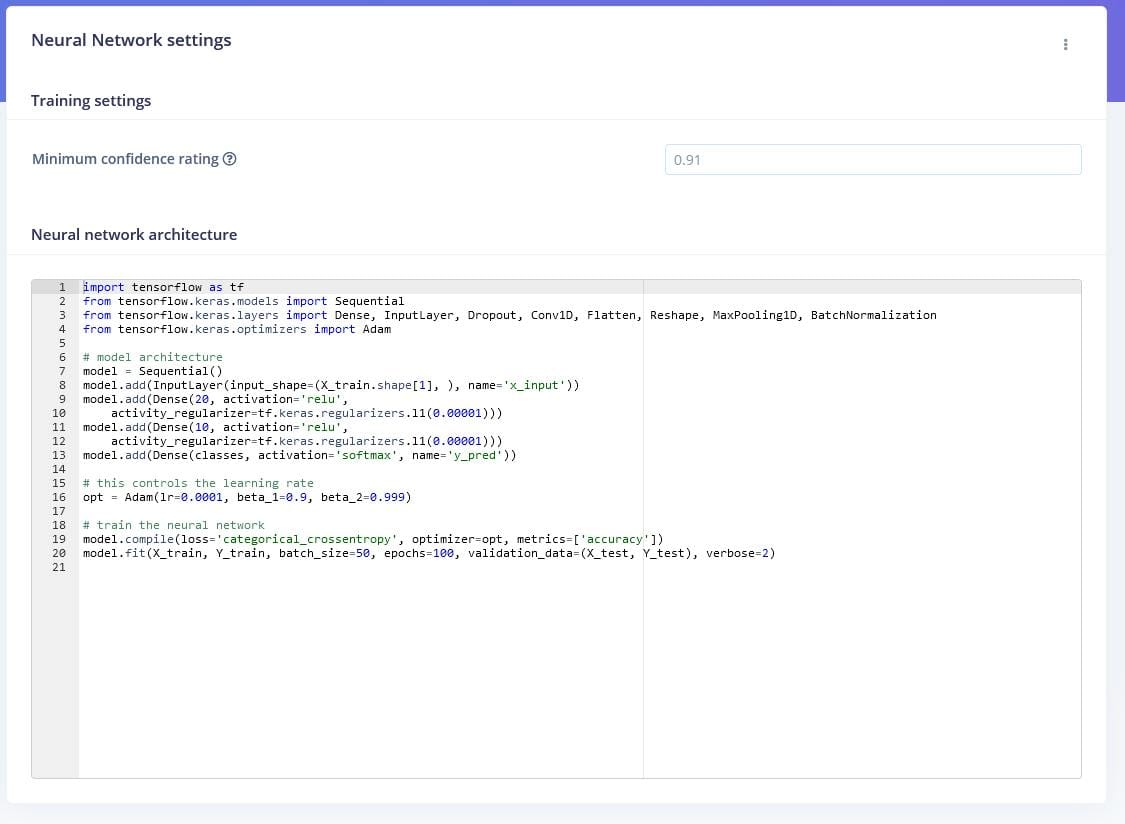
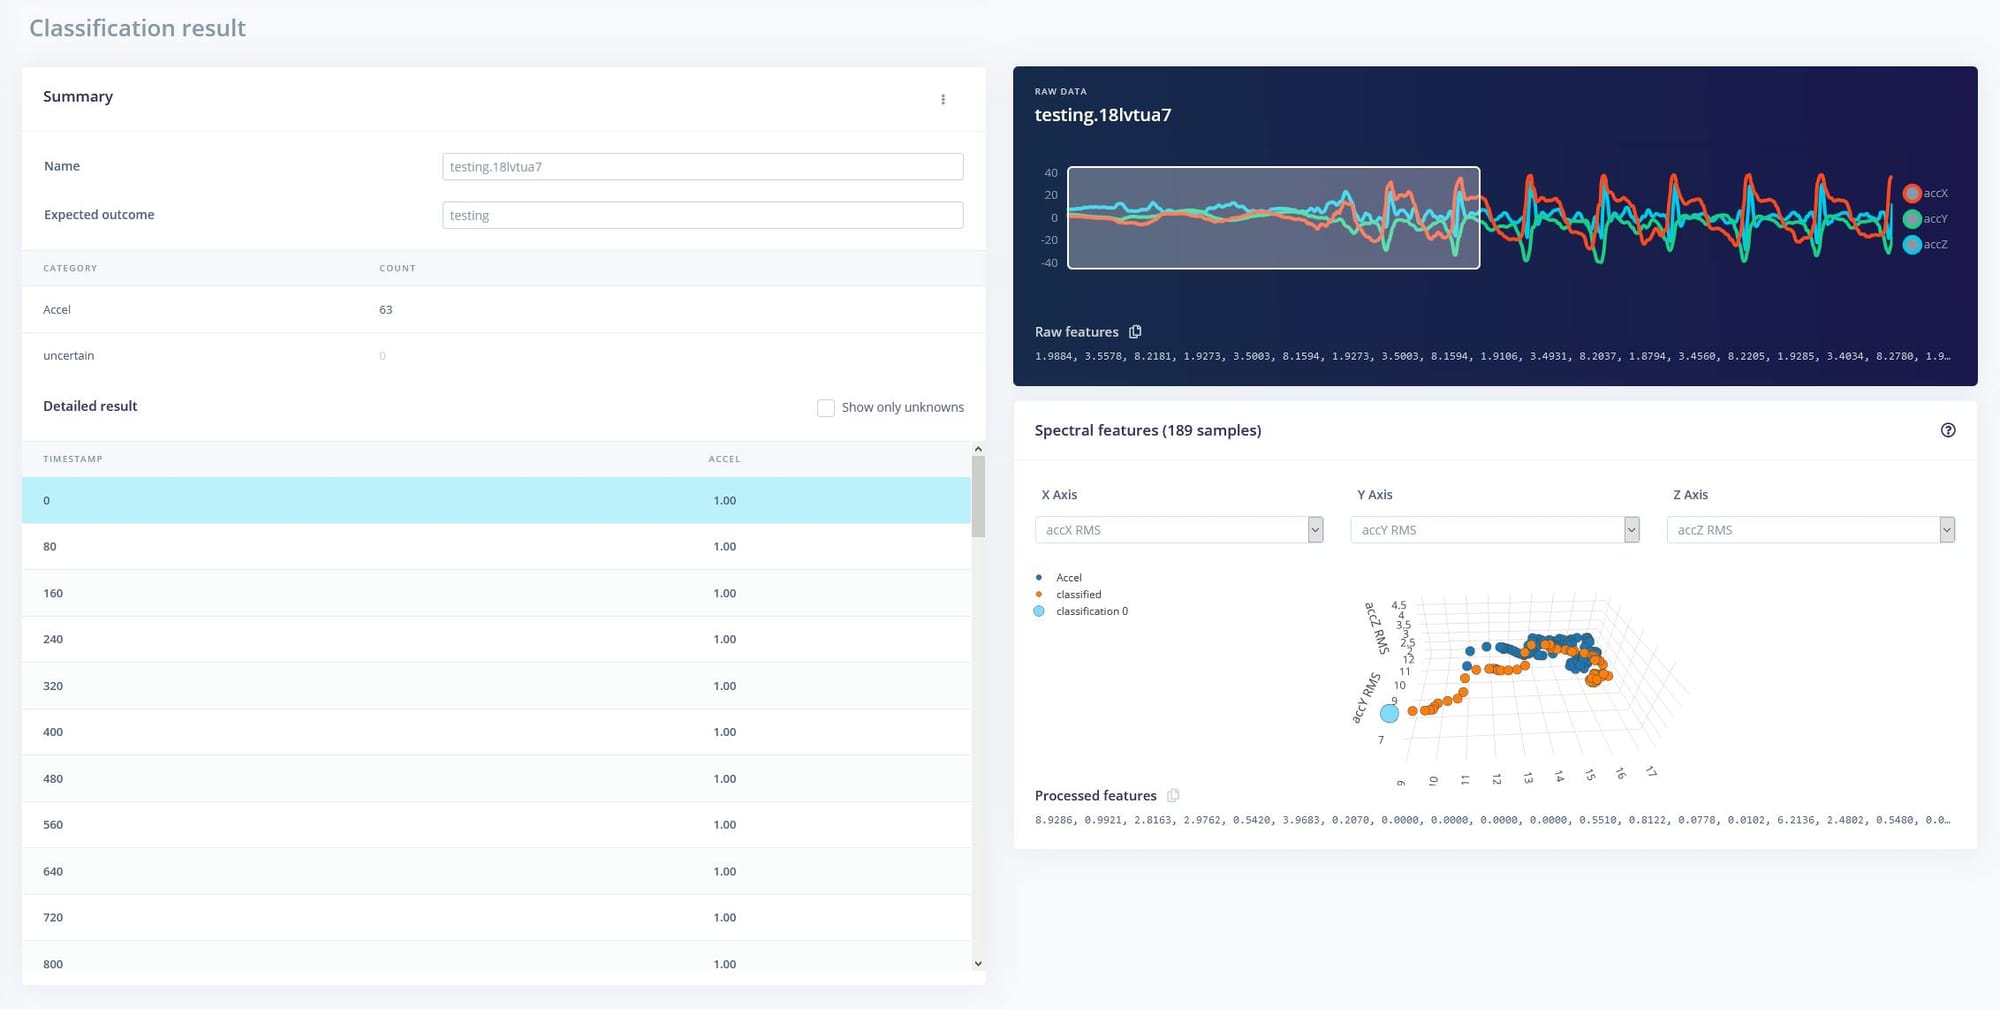
On the NN settings page, I decided to change the default confidence threshold from 80% up to 91%. After training the model, I was able to view a graph of what the model came up with. Then I went to the "Classification" page and gathered a bit more data from my phone and saw what the model was able to detect.
Deploying
To deploy the model, I exported the model as a WebASM file and then unzipped it. Then I created a new js file called run-impulse.js and placed it into the same folder as the model (but the file is attached to this project page). To run it, I entered the node command into the command prompt followed by run-impulse.js and then pasted the "Raw features" array in quotes as the second argument for the node command.
Code
// Load the inferencing WebAssembly module
const Module = require(’./edge-impulse-standalone’);
// Classifier module
let classifierInitialized = false;
Module.onRuntimeInitialized = function() {
classifierInitialized = true;
};
class EdgeImpulseClassifier {
//_initialized = false;
init() {
	if (classifierInitialized === true) return Promise.resolve();
	return new Promise((resolve) => {
		Module.onRuntimeInitialized = () => {
			resolve();
			classifierInitialized = true;
		};
	});
}

classify(rawData, debug = false) {
	if (!classifierInitialized) throw new Error(’Module is not initialized’);

	const obj = this._arrayToHeap(rawData);
	let ret = Module.run_classifier(obj.buffer.byteOffset, rawData.length, debug);
	Module._free(obj.ptr);
	if (ret.result !== 0) {
		throw new Error(’Classification failed (err code: ’ + ret.result + ’)’);
	}

	let jsResult = {
		anomaly: ret.anomaly,
		results: []
	};
	for (let cx = 0; cx < ret.classification.size(); cx++) {
		let c = ret.classification.get(cx);
		jsResult.results.push({ label: c.label, value: c.value });
	}

	return jsResult;
}

_arrayToHeap(data) {
	let typedArray = new Float32Array(data);
	let numBytes = typedArray.length * typedArray.BYTES_PER_ELEMENT;
	let ptr = Module._malloc(numBytes);
	let heapBytes = new Uint8Array(Module.HEAPU8.buffer, ptr, numBytes);
	heapBytes.set(new Uint8Array(typedArray.buffer));

	return { ptr: ptr, buffer: heapBytes };
}

}
if (!process.argv[2]) {
return console.error(’Requires one parameter (a comma-separated list of raw features)’);
}