
In this blog post, we would like to share an exciting application utilizing our recently launched machine vision functionality. We will show you how you can create your own autonomously driving vehicle using EdgeImpulse and the OpenMV platform with a model using only 121 KB of RAM. A favorable aspect of this application is that it is straightforward to collect the required training dataset yourself. The full source code for our project is available here. You will also find instructions here on how to build & train a similar model yourself.
Hardware
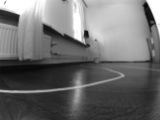
We used an OpenMV Cam H7 sensor to run the neural network and capture images. We utilized an ultra-wide-angle lens (H = 99.0°, VFOV = 81.9°) to provide a better overview of the track in front of the robot. The OpenMV module controls an Adafruit Motor Shield V2 over the I2C bus to power the motors. The robot is built on top of a Baron-4WD electric-powered, four-wheel-drive vehicle chassis. While operating in autonomous mode, we provided power to the OpenMV sensor using a generic USB power bank.
Model architecture

We used four convolutional layers to extract features from the input images. Convolutional layers use local spatial correlations of image pixels to learn shift-invariant convolution filters, capturing discriminant image features [1][6]. The first three layers use a stride of two to reduce the model’s width (memory usage). A maximum pooling layer follows the last convolutional layer for the same reason. We only applied maximum pooling after the final convolutional layer to improve on-device performance.
The convolutional layers are followed by three dense layers, which compute the predicted steering angle based on the extracted features. A Dropout layer precedes the first two dense layers. These layers aid the model to generalize and reduce potential overfitting. Because neurons randomly ’dropout’, the network is forced to build in redundancy.
The final fully connected layers are regularized by an ‘L1’ regularizer. We added this regularizer because we want to prefer simple, generalizable solutions.
Our model is loosely based on Octavio’s Carputer [2] without predicting a throttle output. Our model is based on classification instead of regression. We choose a classification-based approach because regression-based models are currently not yet supported in the Edge Impulse studio, soon we hope to add regression support. To train the described model, we used the Edge Impulse Keras learn block in ‘expert’ mode (for most applications, it is unnecessary to use expert mode).
model = Sequential()
model.add(InputLayer(input_shape=(120, 160, 1), name=’x_input’))
model.add(Conv2D(16, 3, 2, activation=’relu’, padding=’same’))
model.add(Conv2D(16, 3, 2, activation=’relu’, padding=’same’))
model.add(Conv2D(32, 3, 2, activation=’relu’, padding=’same’))
model.add(Conv2D(32, 3, 1, activation=’relu’, padding=’same’))
model.add(MaxPooling2D(pool_size=2, padding=’same’))
model.add(Flatten())
model.add(Dropout(0.5))
model.add(Dense(32, activation=’relu’, kernel_regularizer=’l1’))
model.add(Dropout(0.25)) model.add(Dense(16, activation=’relu’, kernel_regularizer=’l1’))
model.add(Dense(7, activation=’softmax’))
Collecting data
We collected a dataset of around 5000 samples while manually steering the car around the track using keyboard input. Every 300 milliseconds, we captured an image from the camera and the current steering direction. We captured images at a resolution of 160 x 120 (width x height) in grayscale color mode.
About 60% of the collected dataset is composed of the car following an optimal path inside the track. The remainder consists of recovering from abnormal car positions. For example: when the vehicle faces the track boundaries or when the vehicle is outside the track
Due to the current model architecture, it is essential to be cautious, adding samples to the dataset where the car is far outside the track, as this might result in the model cutting track corners. We have mirrored every collected image to augment the dataset and added it to the dataset with the steering direction inverted. It is essential to collect the dataset under multiple lighting conditions to achieve a model that performs well under differing conditions.
Training
To prevent overfitting, we save the model with the lowest validation set accuracy seen during training (Edge Impulse does this automatically for the user).
To regularize the training process, we have defined a custom loss function similar to label smoothing [4]. Our loss function makes sense since our classes aren’t linearly independent, for example, a prediction of steering angle ’-2’ when the actual angle is ’-3’ is more correct than steering angle ’1’. Therefore we smooth the labels according to a Gaussian distribution before computing the categorical cross-entropy in the standard way.

def loss(y_true, y_pred):
    diff = (K.dot(y_true, A) - y_pred)
    return K.sum(K.sum(diff * diff, axis=1))
The figure below shows the validation set accuracy during training when using the described custom loss function versus categorical cross-entropy.

We evaluated the model accuracy by calculating the mean squared error between the predicted steering and actual steering angles. To calculate the steering angle, we computed the dot product between the classification output function and a vector of class steering angles.


Performance
We evaluated the performance of our model on a test data set consisting of manually recorded steering angles and images. The figure below shows the manually recorded steering angles plotted against the steering angles predicted by the model on the same images.

We aimed for an on-device inference time below 30ms, allowing the inference to run at 30+ FPS. We experienced that when running the inference at lower framerates, the robot steering will appear ‘choppy’.
We computed the number of multiply-accumulate operations (MACC’s) [3] per layer to get a sense of the performance impact of each model layer [9]. Based on these numbers, we were able to finetune our model to increase performance. The MACC’s for the model presented in this post are shown in the table below:

Future
There are many exciting avenues to be taken to extend on this work; we will describe a few interesting ones below.
It would be beneficial to improve the model’s accuracy estimation. In our current setup, we compute the accuracy as the difference between the training set steering angle and the model prediction. This calculation does not take into account the temporal structure of the data. Ideally, the performance of the model should be evaluated on full paths around the track. For each path, one could then compute multiple performance measures, such as the length and smoothness of the chosen path. One could perform such accuracy estimates either by recording data on the device or by setting up a simulated environment (for example using Unity [5]).
To aid the model in choosing an optimal path it might be useful to provide temporal data to the model, for example, by adding past steering angles to the model input or by adding a recurrent layer [8].
Another fascinating extension would be to add obstacles to the track and extend the model with object detection/avoidance [6]. To allow the model to estimate the distance to an obstacle more accurately, one could add an additional camera to provide the model with stereoscopic input [7]
References
- Representation Learning: A Review and New Perspectives
- Octavio’s Carputer
- Multiply–accumulate operation
- Regularizing Neural Networks by Penalizing Confident Output Distributions
- Warehouse Simulator
- Off-Road Obstacle Avoidance through End-to-End Learning
- Deep Learning Stereo Vision at the edge
- Analysis and Evaluation of Recurrent Neural Networks in Autonomous Vehicles
- How fast is my model?