
Pneumonia has troubled the world for decades, with deaths mounting when early detection is missed. The World Health Organization estimates that each year the number of people affected by pneumonia is nearly 450 million, with the number of deaths reaching 4,000,000 per year, mostly in the developing world. These numbers represent a lot of pain, lost dreams and grief for people everywhere, and can be mitigated.
Pneumonia detection can be out of reach for many!
So far, the detection of pneumonia is achieved by using x-rays, chest scans or extracting blood serum in extreme cases. BUT this requires time, resources, skilled personnel, and it is expensive!
Solving for cost, location and speed will save lives
I’ve been working on a solution that harness low-cost hardware and software that can deliver effective detection for people everywhere, regardless of location, skill and affordability. With the help of Edge Impulse and their hardware partners, I can show you how to effectively detect and alert of potential pneumonia!
Here’s how I built it
Pre-requisites
Hardware required:
- Raspberry Pi (3/4 Model B/balenaFin)
- 5v power supply for Raspberry Pi
- SD card (it’s recommended to use one which is more than 8GB)
But we can also run our model on devices consuming a few milliwatts, such as:
- Himax WE-1 Development Board
- OpenMV Cam H7 Plus (use this if you wish to use RGB images instead of Grayscale)
Software required:
- Edge Impulse Studio
- OpenMV IDE (for communicating with the OpenMV board)
- balenaCloud (for deploying our application onto your Raspberry Pi)
- Git client installed on your host machine
- balenaEtcher (to flash the balenaOS image onto your SD card for the Raspberry Pi)
Now let’s detect pneumonia
We have divided the getting started instructions into two different parts for two different types of hardware used.
Deploying our EI model onto a Raspberry Pi
Click on the deploy-with-balena button as given below, which will help you to deploy your application to balenaCloud and then to your Raspberry Pi in one click!

Sign up to balenaCloud
If you don’t have a balenaCloud account, first thing you’ll need to do is sign up for a balenaCloud account. If you’ve already got a GitHub or Google account you can use that to login and bypass the signup process on the balenaCloud.
Add a device and download the OS
Once your application has been created and the code is being released on the app on balenaCloud, click the blue button Add Device. When you add a device you specify your device type (Raspberry Pi 3, 4 or balenaFin). If you are connecting to a wireless network you will need to set your WiFi SSID and credentials here, too.
This process will create a customized image configured for your application and device type and includes your network settings.
Flash your SD card and boot the device
Once the OS image has been downloaded, it’s time to flash your SD card. You can use balenaEtcher for this.
After the flashing process has completed, insert your SD card into your device and connect the power supply.
When the device boots for the first time, it connects to the balenaCloud dashboard, after which you’ll be able to see it listed as online. If the release went well, the new services will be downloaded in your device and it will start the containers running the services.
Testing the classifier
Once the containers are deployed on your device using balena. Enable the Public device URL on your device. Open your browser using the public URL provided by balenaCloud or enter your device’s local IP.

The camera feed should be displayed on the webpage. If you notice slow framerate, probably your web browser doesn’t support WebRTC and your client has switched to MJPEG. You can check the next section to debug WebRTC.
Try to move different objects in front of the camera and see how well the classifier works! Predictions are displayed for all labels with values between 0 and 1, 1 being a perfect prediction.
Deploying to a Himax WE-1 dev board
First download the himax_library_package
Next, extract the.zip file and click on any of the flashable binaries as per your OS (supports Mac, Linux and Windows).
Then, open Terminal/Command Prompt and type edge-impulse-run-impulse and wait for a couple of seconds for the CLI to connect with the board via serial.
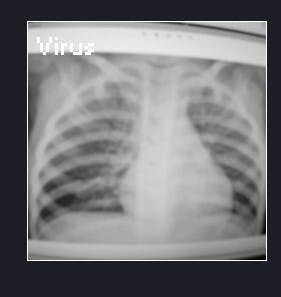
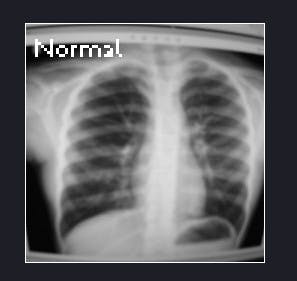
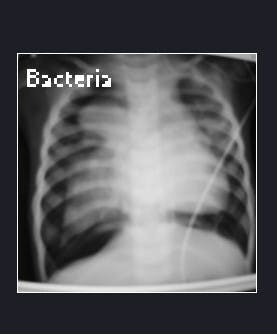
Finally, move the board to any X-Ray or download our dataset images from here and that’s it you’re done!
Deploying to an OpenMV Cam H7 Plus board
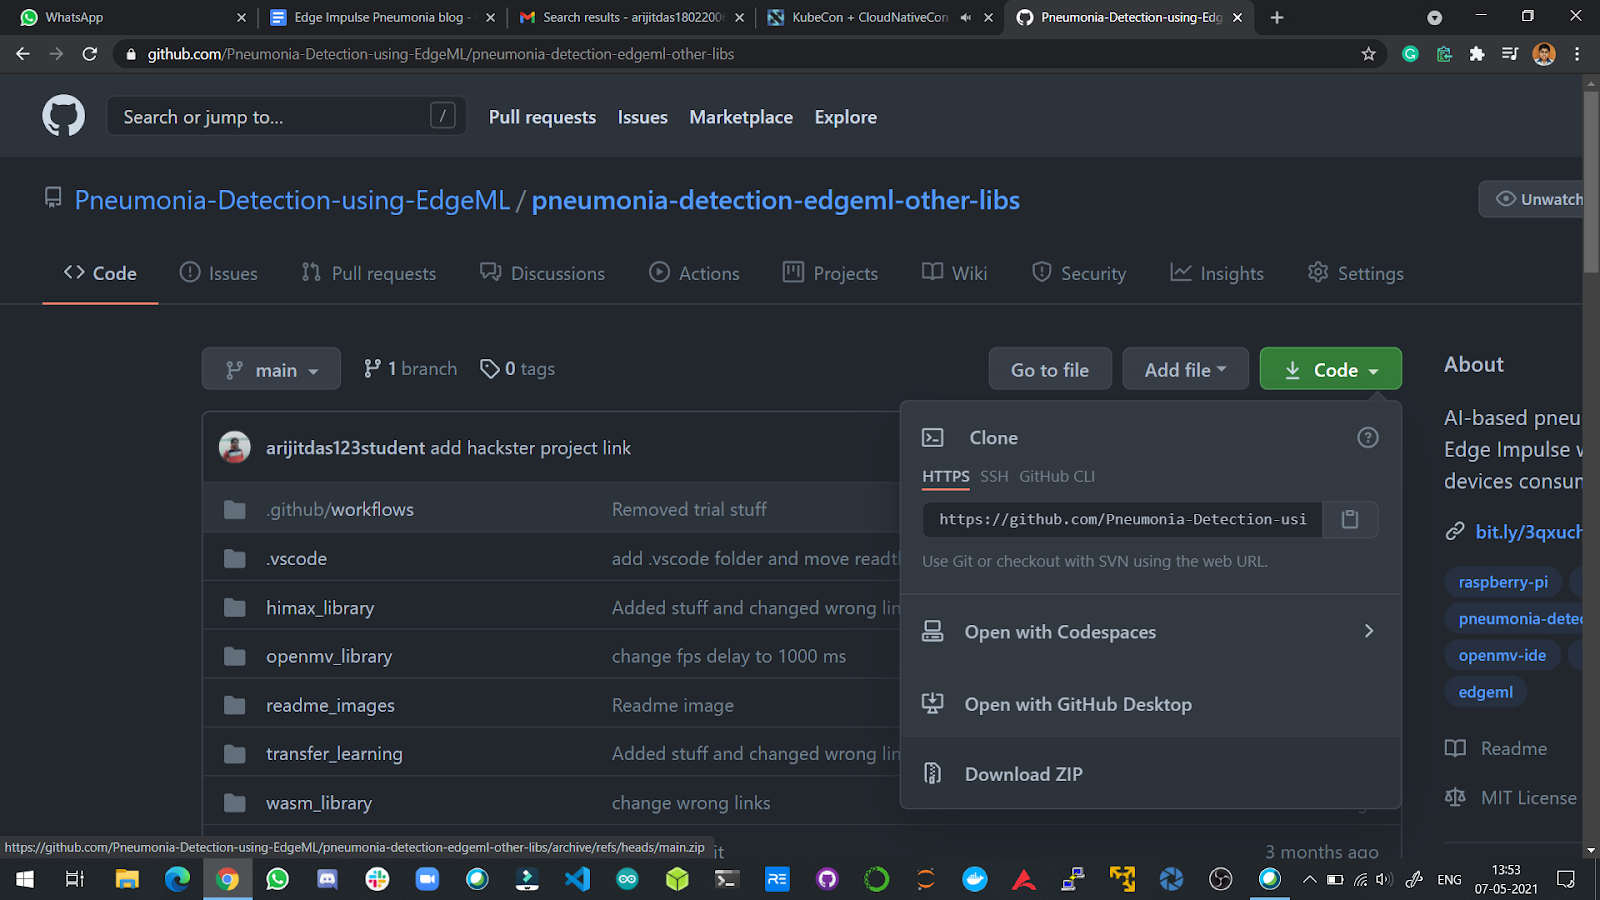
First, you will have to clone our repository using the following command:
$ git clone
Next, open up the openmv_library file from the folder created in your machine using the command laid below.
$ cd pneumonia-detection-other-libs
After doing a $ls you will get to see 4 different files inside the sub-folder such as:

Now, to add the model to your OpenMV camera, copy the trained.tflite and labels.txt files to the ’OpenMV Cam’ volume (like a USB drive).
From there, open the ei_image_classification.py file in the OpenMV IDE, and press the ’Play’ icon to run the script.
You will get to see outputs such as this:
That’s it you’re done!
Congratulations! You’re now running an ML model that can classify pneumonia under one milliwatt!

Links and resources
- GitHub organization containing both the repositories
- Hackster project write-up
- Edge Impulse Studio public project
- Connect with me here
Arijit Das is the youngest Edge Impulse ambassador. He likes emojis and GIFs a lot!