
Intro
This article will give you an understanding on how models built with Edge Impulse may be used with IoT Edge on Microsoft Azure, enabling the models to be implemented in a large-scale solution. Azure IoT Edge is part of the IoT Hub where device identities can be created and managed. On supported devices, a container runtime is installed to let IoT Edge manage Docker containers, referred to as modules. Along with this runtime and two system modules comes several benefits, as the possibility to update application parameters or the whole application itself, and logic around application messages and internet connectivity.
Edge Impulse is avaliable on Linux along with SDKs for Node.js, Python, Go and C++. For scenarios when you want to make use of your applications on a bigger scale, Azure IoT Edge might be a convenient option to deploy it.
Demo
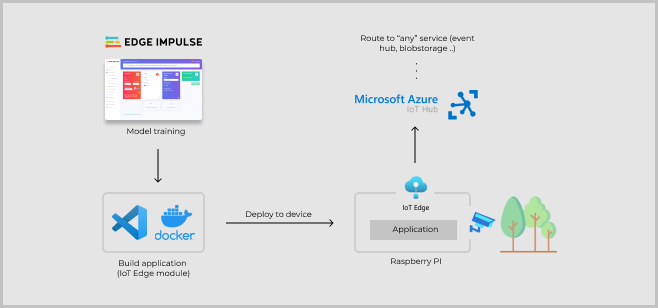
To demonstrate how these two services can be used together, we’ll look at:
- Building an object detection model with Edge Impulse.
- Creating an IoT Edge solution with a Python application (IoT Edge module).
- Adjust the Python application to use the object detection model, then build and push the application to a Docker container registry.
- Prepare a Raspberry Pi device to run IoT Edge and connect with Azure IoT Hub.
- Deploy application and manage device.
Build model with Edge Impulse
Note: For detailed and updated instructions, follow this guide in the Edge Impulse documentation to create a model for object detection. The guide focuses on object detection, however it can run models for image classification as well.
Sign up for an account on Edge Impulse and choose the option to build a model for object detection. You can collect data from development boards, from your own devices, or by uploading an existing dataset. Read more about the data forwarder or view the list of fully supported development boards here.
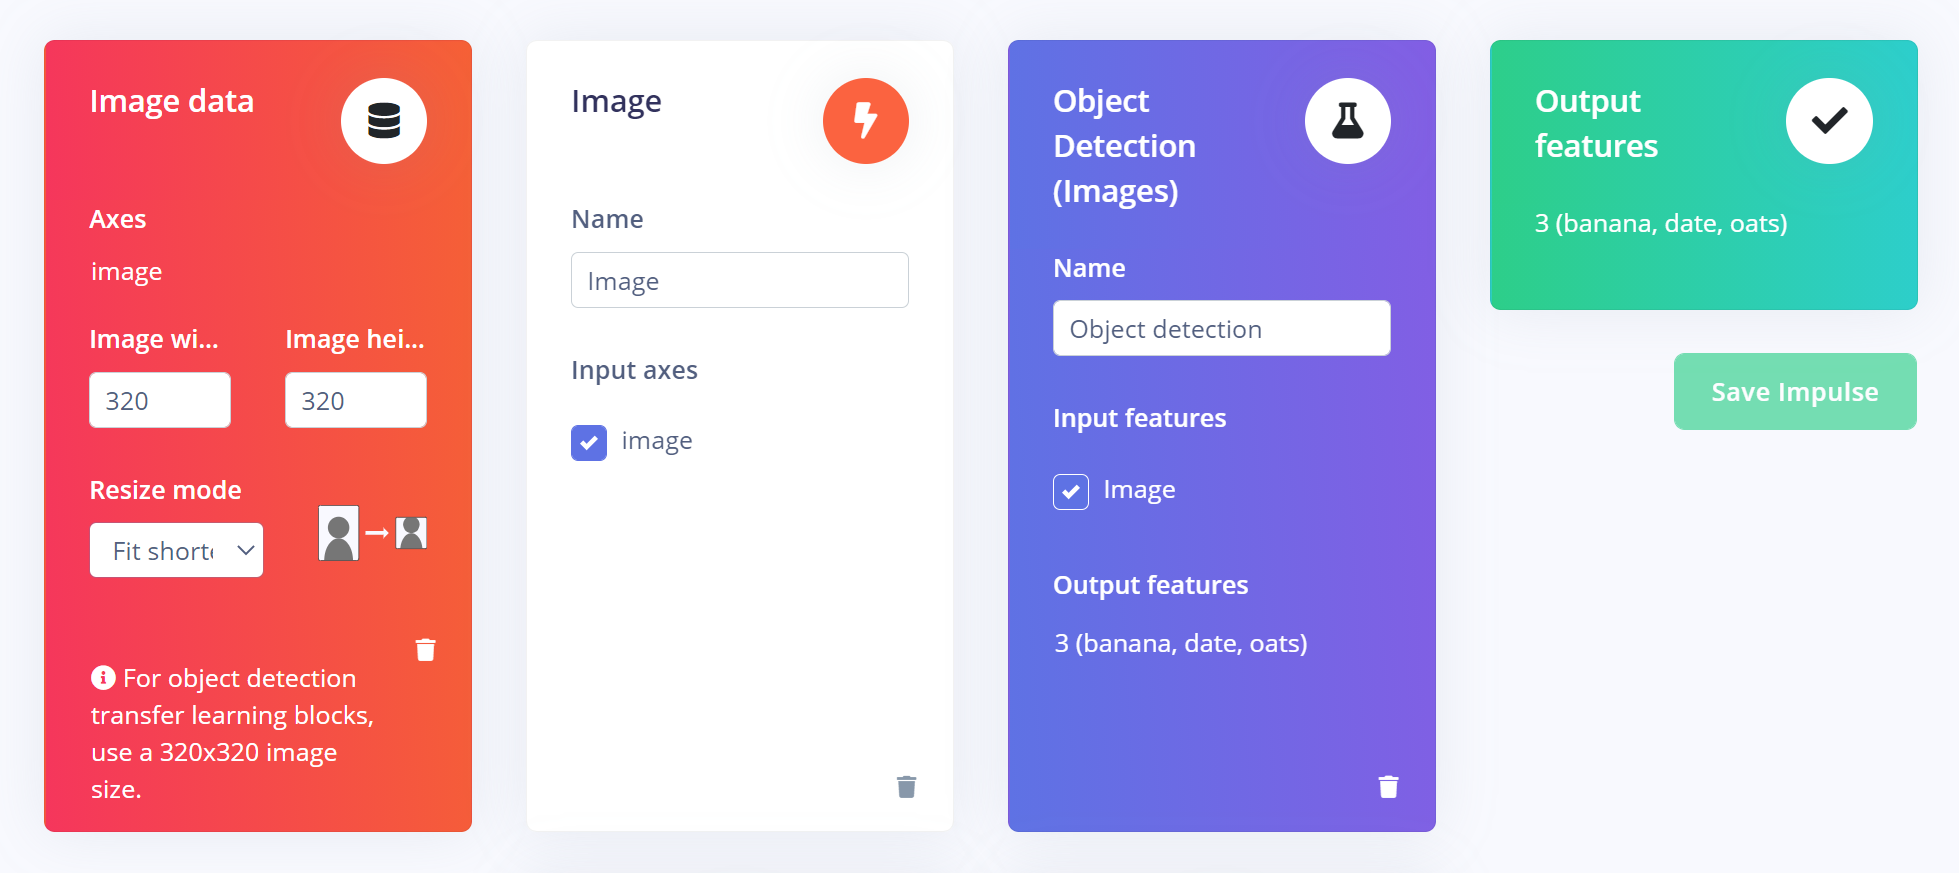
At the Impulse design tab, the steps for input data processing, training block, and output features are defined. An impulse takes raw data, uses signal processing to extract features, and then uses the training block (the neural network) to classify the data. Based on project settings, suitable blocks will be suggested and in this case, object detection is used. I used the model MobileNetV2 SSD FPN-Lite 320x320 which supports RGB images with 320x320 pixels. Go throuh each step to start the training and then a good idea is to test the model at the Live classification page. Finally, go to the Deployment page and pick Linux to build the model and it will be ready for download.
With the Linux CLI for Edge Impulse, it is possible to aquire data as well as to run the resulting model. That is, you might already used it when collecting data for the model in the first step. At this step we just want to fetch the modelfile, and a way to do it is by installing the Edge Impulse for Linux CLI (choose Raspberry Pi 4) and download model by running the following in the terminal:$ edge-impulse-linux-runner --download modelfile.eim Later on, we will use the model along with an Edge Impulse SDK, however the SDK will be installed to the Docker image where the application runs.
Note: An alternative idea is to use the Edge Impulse API to automatically download the modelfile to the Docker container, e.g. by entering the EI project id a an enviroment variable and add an instruction to the Dockerfile to perform the download.
Create an IoT Edge solution in Visual Studio Code
Let’s create the application project! Open up VS Code and install the extension Azure IoT Tools. Then, run the Command Palette (Ctrl+Shift+P) to easy access the extension commands and search for the option Azure IoT Edge: New IoT Edge Solution. Enter a container registry (where Azure Container registry is convenient) for your modules and then you will have the option to create your first module. Pick Python module and you will be provided a template application that listen for messages on the edge broker and forwards them. In short, the deployment template defines what modules should run on the device, what Docker and application settings they have, and how they communicate with each other. Two system modules are always included, and by default there is an example module that publishes simulated temperature data.

Create a Python application with the tinyML model
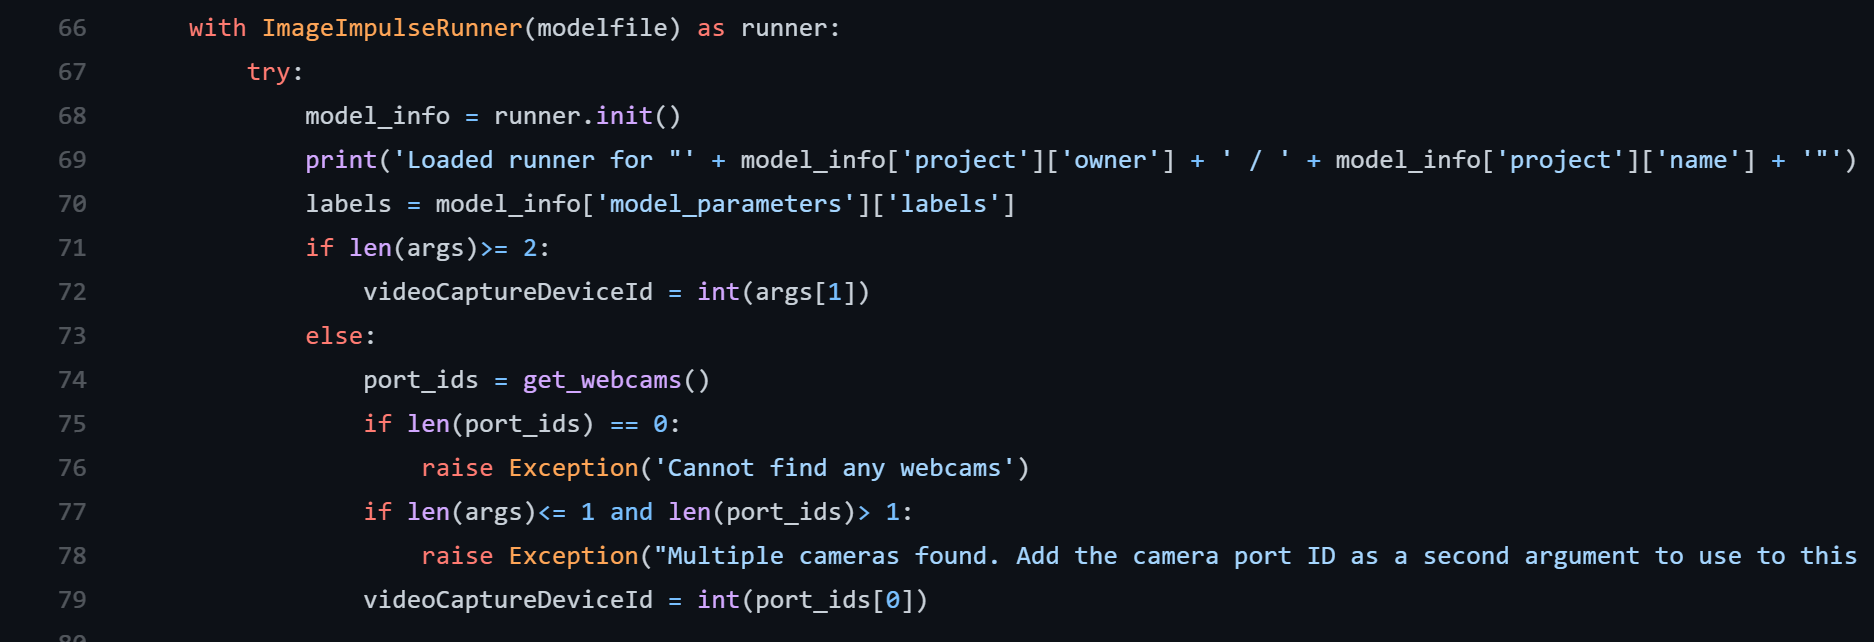
Let’s replace the sample module code with an application that uses our object detection model trained. The application code is based on the Image example in the repository of Edge Impulse Linux SDK for Python. In this adjusted implementation, a Azure IoT client is introduced to send telemetry data to the IoT Hub or another module. Note that I have also assigned Docker create options in the deployment table, like binding to the /dev folder on the host to the container.
You can adjust the code to your needs and of course refactor as the application grows. In the main.py file you will find example usage of listening to updates in module configuration, report properties and sending telemetry. More ways to make use of the IoT Hub connection are found in the IoTHubModule class documentation. Use the VS code extension to debug the Edge solution, it will simulate your machine as being an IoT Edge device and telemetry can be streamed in the Azure IoT Explorer. How the telemetry is handled is defined as SQL statements in the deployment, which you may edit in the Azure portal or in the deployment template. Remember to include your own downloaded modelfile.eim to application folder.
Build and publish
To encapsulate the application as a Docker image, we need to come up with a Docker file that describe how to install all dependencies for the Azure IoT client, Edge Impulse as well as OpenCV for camera capture and image processing. This may be a little tricky, for more explanation and a working example you can visit the GitHub repo for this article.
With the Dockerfile completed, use the IoT Edge Command Palette again and run “Build and Push IoT Edge Module Image” and you will be prompted to pick your module configuration file. This file define which Dockerfile will be used (based on current platform setting) and what registry to push the image to. When you see “Finished build and publish module” you may also enter your container registry to see it. Note that it’s also possible to build and push all modules in an application by trigger the action from the deployment template file.
Prepare a Raspberry Pi device to run IoT Edge
First, flash your Raspberry Pi 4 with Raspberry OS to an SD card with your favorite flashing tool, like Raspberry Imager or Balena. Then, prepare the device for headless usage by enabling SSH and setting up WIFI or use Ethernet cable.
Secondly, install dependencies for IoT Edge runtime. Please follow the instructions in the Microsoft documentation.
Notes:
- A prerequisite is an Azure account with a free or standard IoT hub in your Azure subscription where you will create a new IoT Edge device.
- The easiest way to authenticate during development is Option 1: Authenticate with symmetric keys. That is, you copy the device connection string from your device in Azure IoT Hub to enter in the config.toml file in the Provisioning section.
Deploy application and manage device
From the extension in VS Code you will find the option to build and push your IoT Edge solution. Thereafter, a generated file has been created in a folder named config. Right-click and choose Create deployment for single device. Make sure you have completed the steps to create a container registry (like Azure Container Registry or Docker Hub), and you probably want to fill in the registryCredentials in the deployment template to authenticate towards the registry.
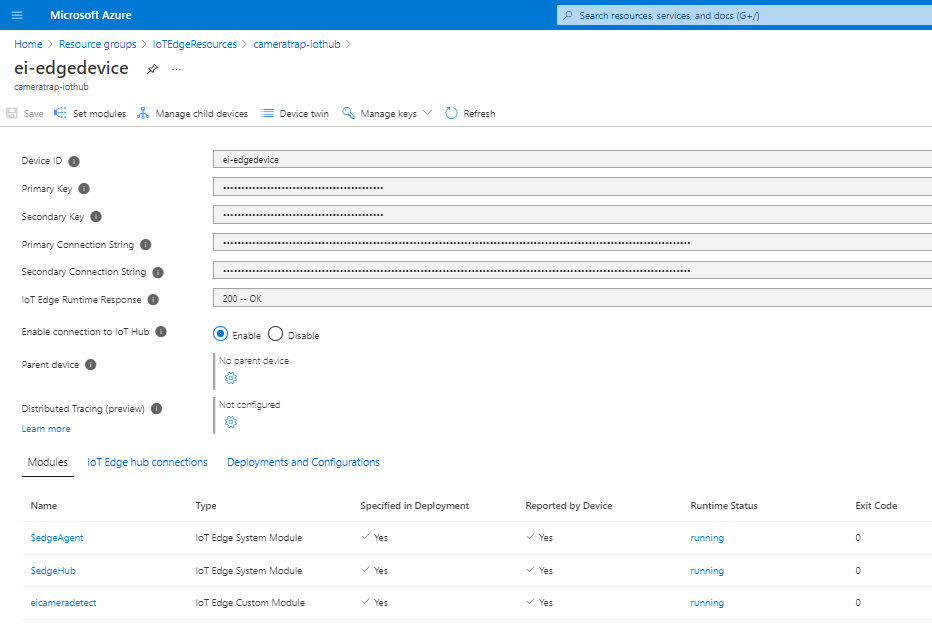
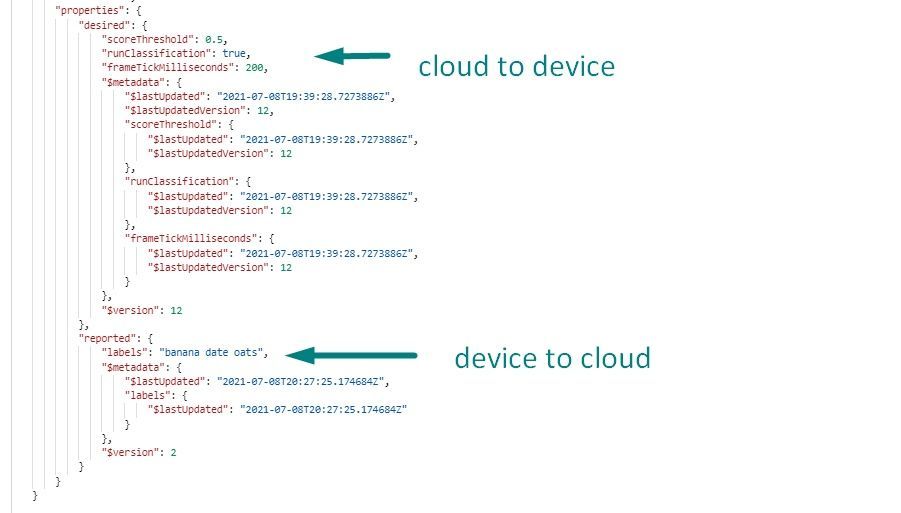
After a successfull deployment, the device in Azure IoT Hub would look similar to the screenshot below, where eicameradetect is the name of my custom module. You may also enter the eicameradetect module and view/edit its module twin. Application settings can be defined in code and be updated here during runtime (maybe the threshold value needs to be increased or the sample interval decreased..). Moreover, the device can report information back to the cloud using the IoTHubModule class.
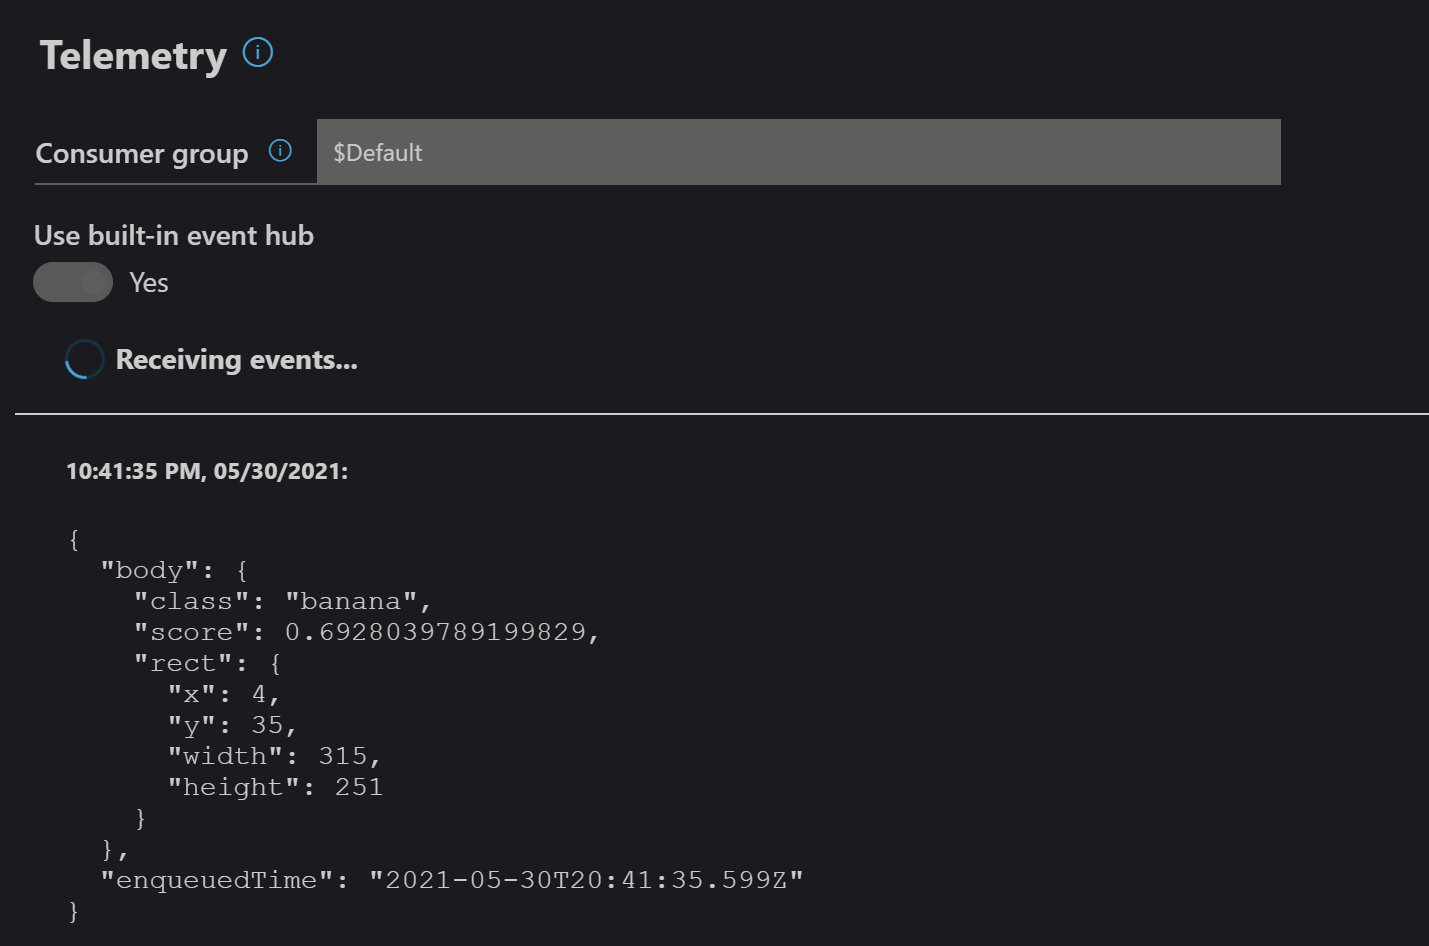
And the module is running! The resulting telemetry from the module may be routed to another module that performs actions on the device based on the model output, or in various ways in the cloud. Learn more about telemetry routing here and you can connect your data to custom websites or backend code like serverless Azure Functions and more. Good luck!
If you are interested in trying it out yourself, this project is available publicly here.