
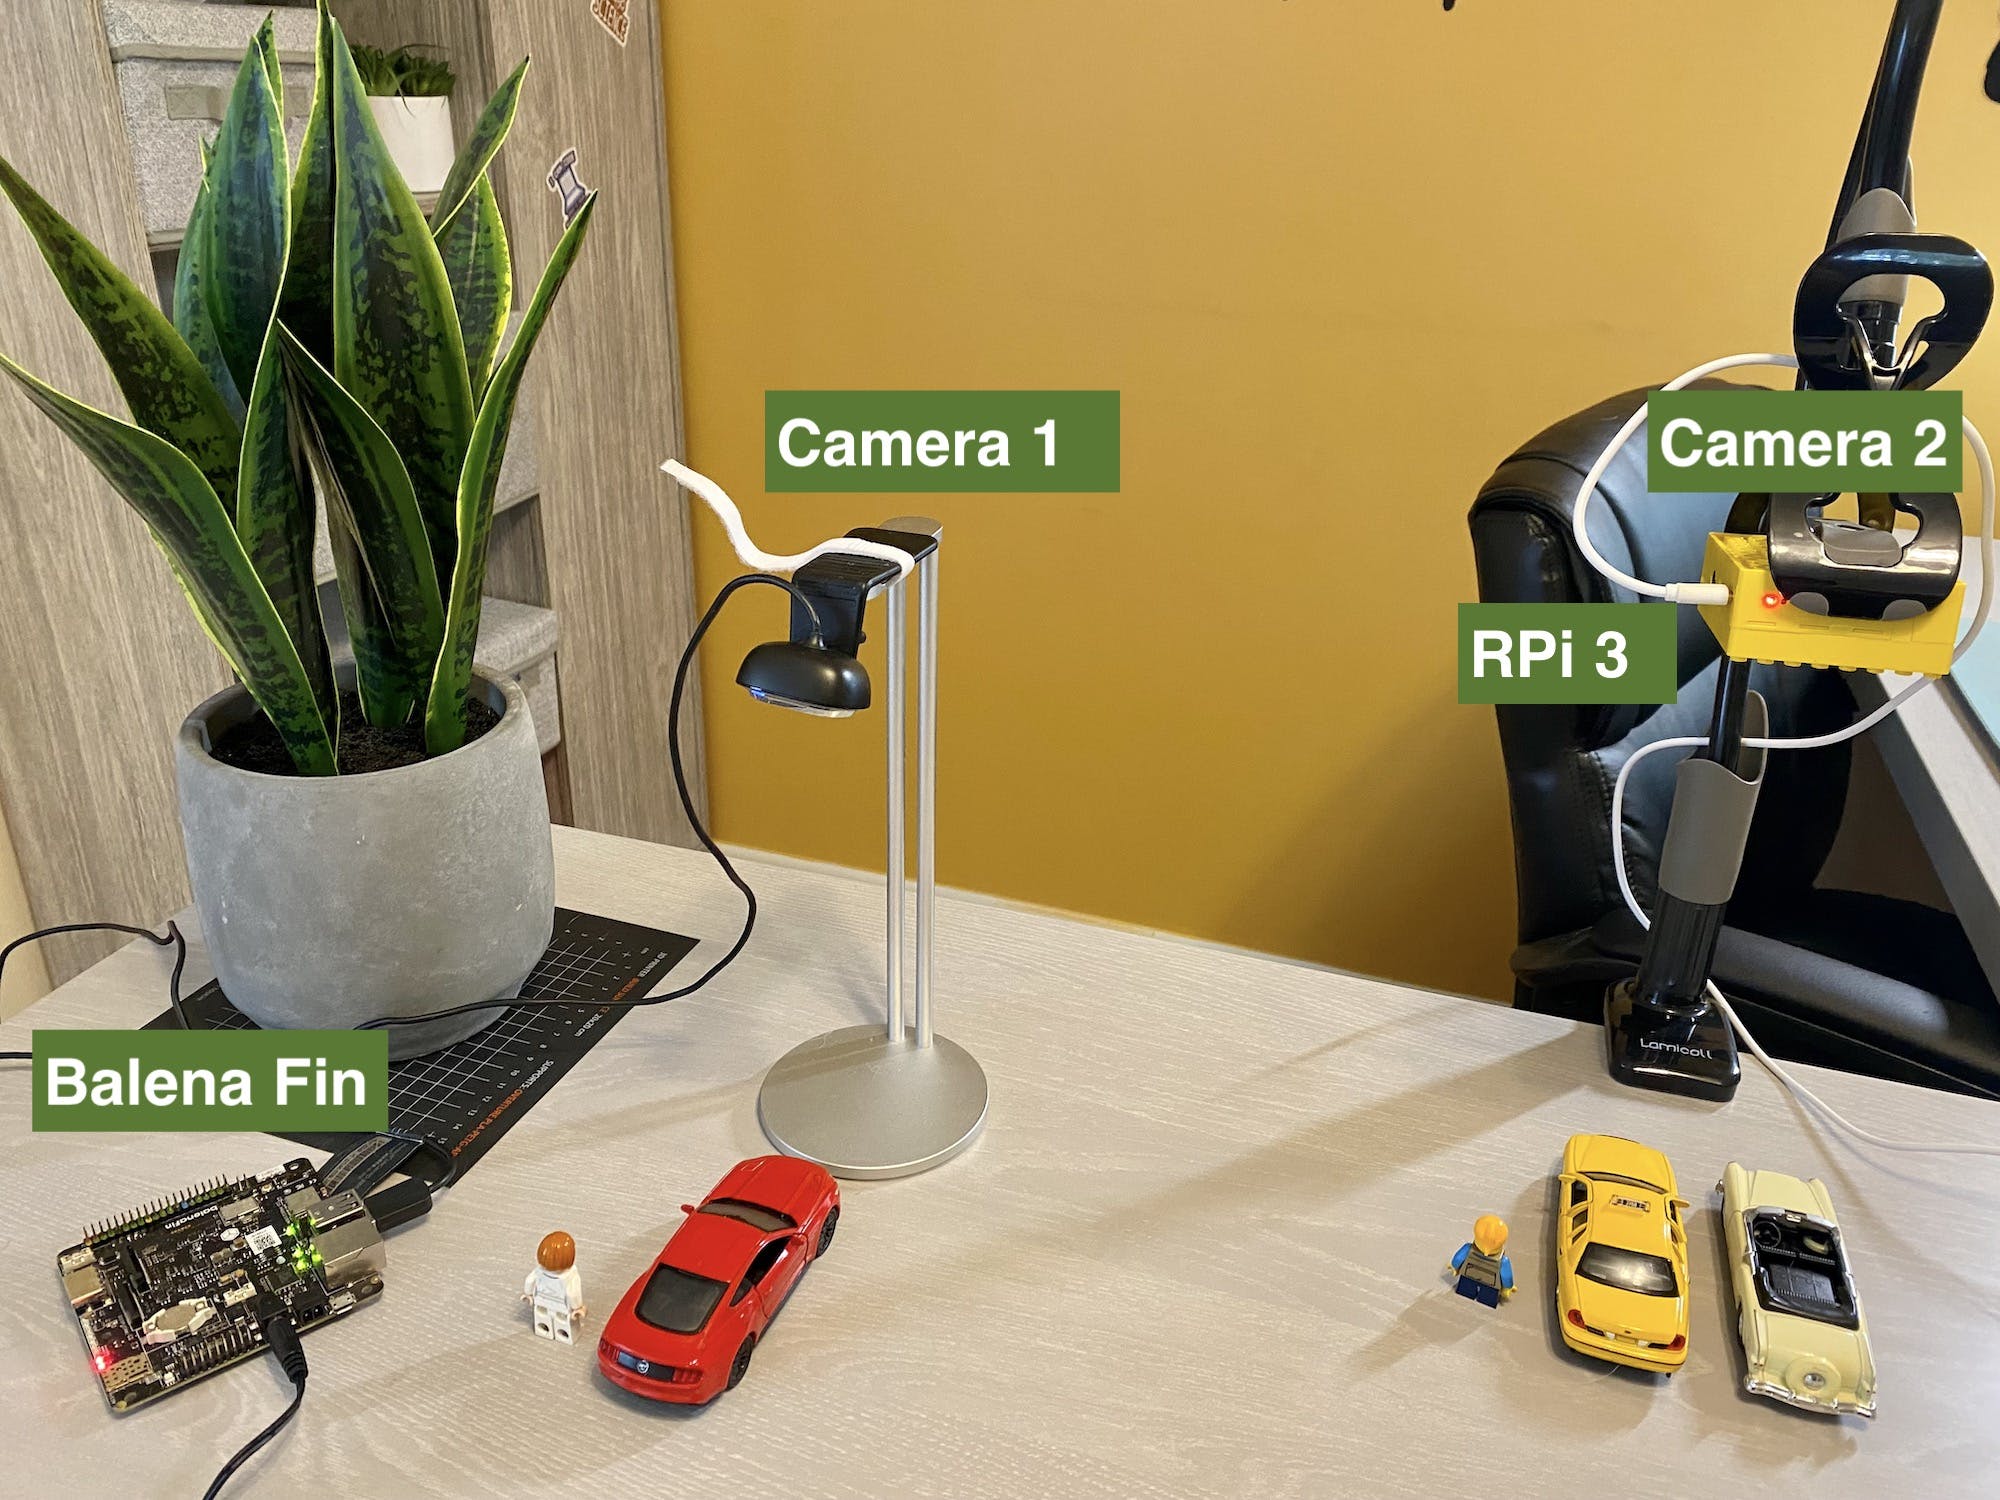
This project is a proof of concept to demonstrate how easily you can deploy a fleet of edge devices running a tinyML model with object detection capabilities. I have chosen a simple use case of counting cars in a parking lot. You can use similar infrastructure to build any kind of objection detection application such as identifying product defect in real manufacturing workflow, automate car inspection for exterior damages, etc. Parking facilities need to know how many cars are parked in a given facility at any given point of time, to evaluate how many empty parkings available and intake more customers. You also want to keep track of the number of cars that enter and exit your facility during any given time. You can use this information to improve operations, such as adding more parking payment centers, optimizing price, directing cars to different floors etc. Parking center owners typically operate on multiple floor or more than one facility and they want to manage a fleet of devices and aggregate real-time data to take efficient decision on business process.
Software
- Sign up for a free Edge Impulse account
- Sign up for a free BalenaCloud account
- balenaEtcher
- Sign up for a free AWS account
- Python 3.7+ and pip
Create AWS IoT resources and certificates
You must have an active AWS account to create resources on AWS cloud. First install and configure AWS CLI:
pip3 install awscli --upgrade --userOr follow this link. After installation is done, you need to configure AWS CLI. Follow this article to set it up.
You are now ready to create AWS resources. To communicate with AWS IoT Core from edge devices, at minimum we need following AWS resources to be created:
- A policy
- Key and certificate
- Thing
Policy needs to be attached to the certificate and certificate needs to be attached to the “thing.” If you are doing this first time, this might sound complicated. Don’t worry! I have a Python register.py utility program under device_registration folder, which will create all above resources. Before you execute the program, you may want to change below variables.
THING_NAME="EI_BALENA_THING"THING_TYPE="EI-Thing"POLICY_NAME="EI-Thing-Policy"Then execute below commands:
cd device_registrationpython3 register.pyAbove program will create all the resources and download the key and certificate and store them under certs folder. To validate, you may run pubsub.py. This program will connect to your AWS IoT core using downloaded key & certificate and send data to EI_TOPIC topic every five seconds. Log into your AWS console and make sure your topic is receiving data.
Once everything is verified and looking good, copy below files from device_registration/certs folder to ei_processing/app/certs
certificate.pem.crtprivate.pem.keyCreate Edge Impulse project
Head over to Edge Impluse Studio, click on your profile name, then click on + Create new project. Enter a name for your project and choose object detection when prompted. After your project is created, you will be taken to project dashboard page. Click on "Keys" tab and create a new API key.
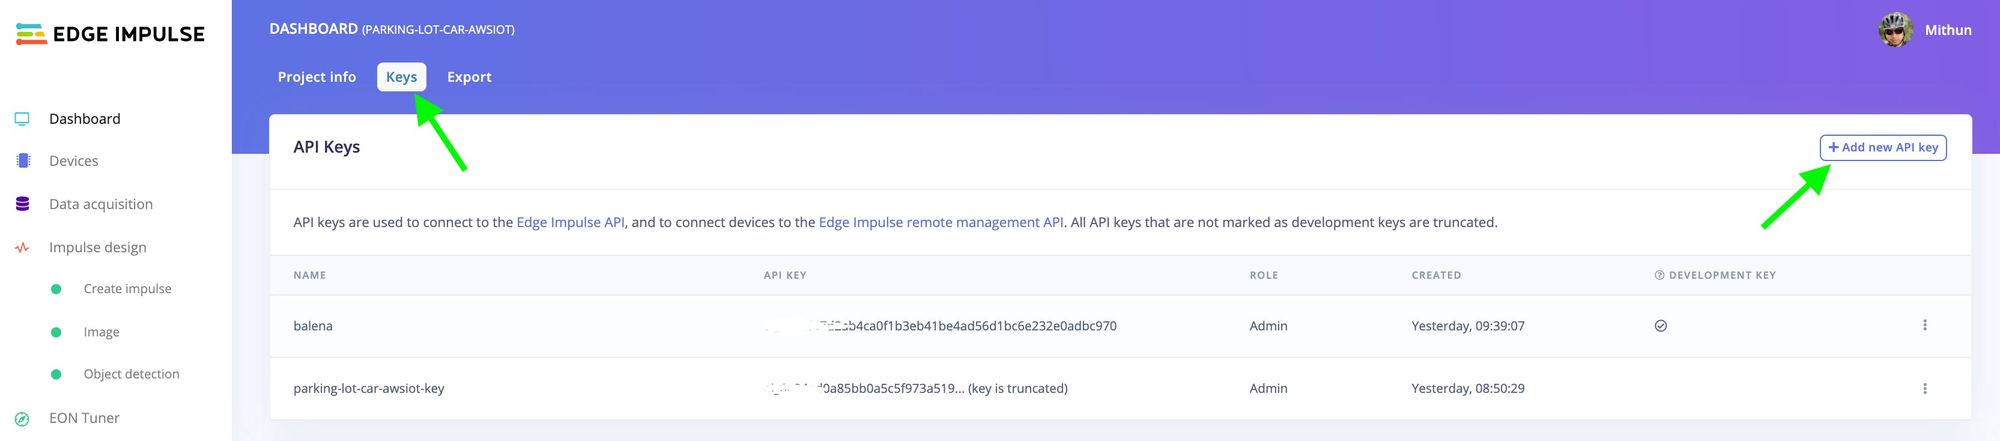
Copy the API key and save somewhere. You need that in a moment.
Create Balena fleet
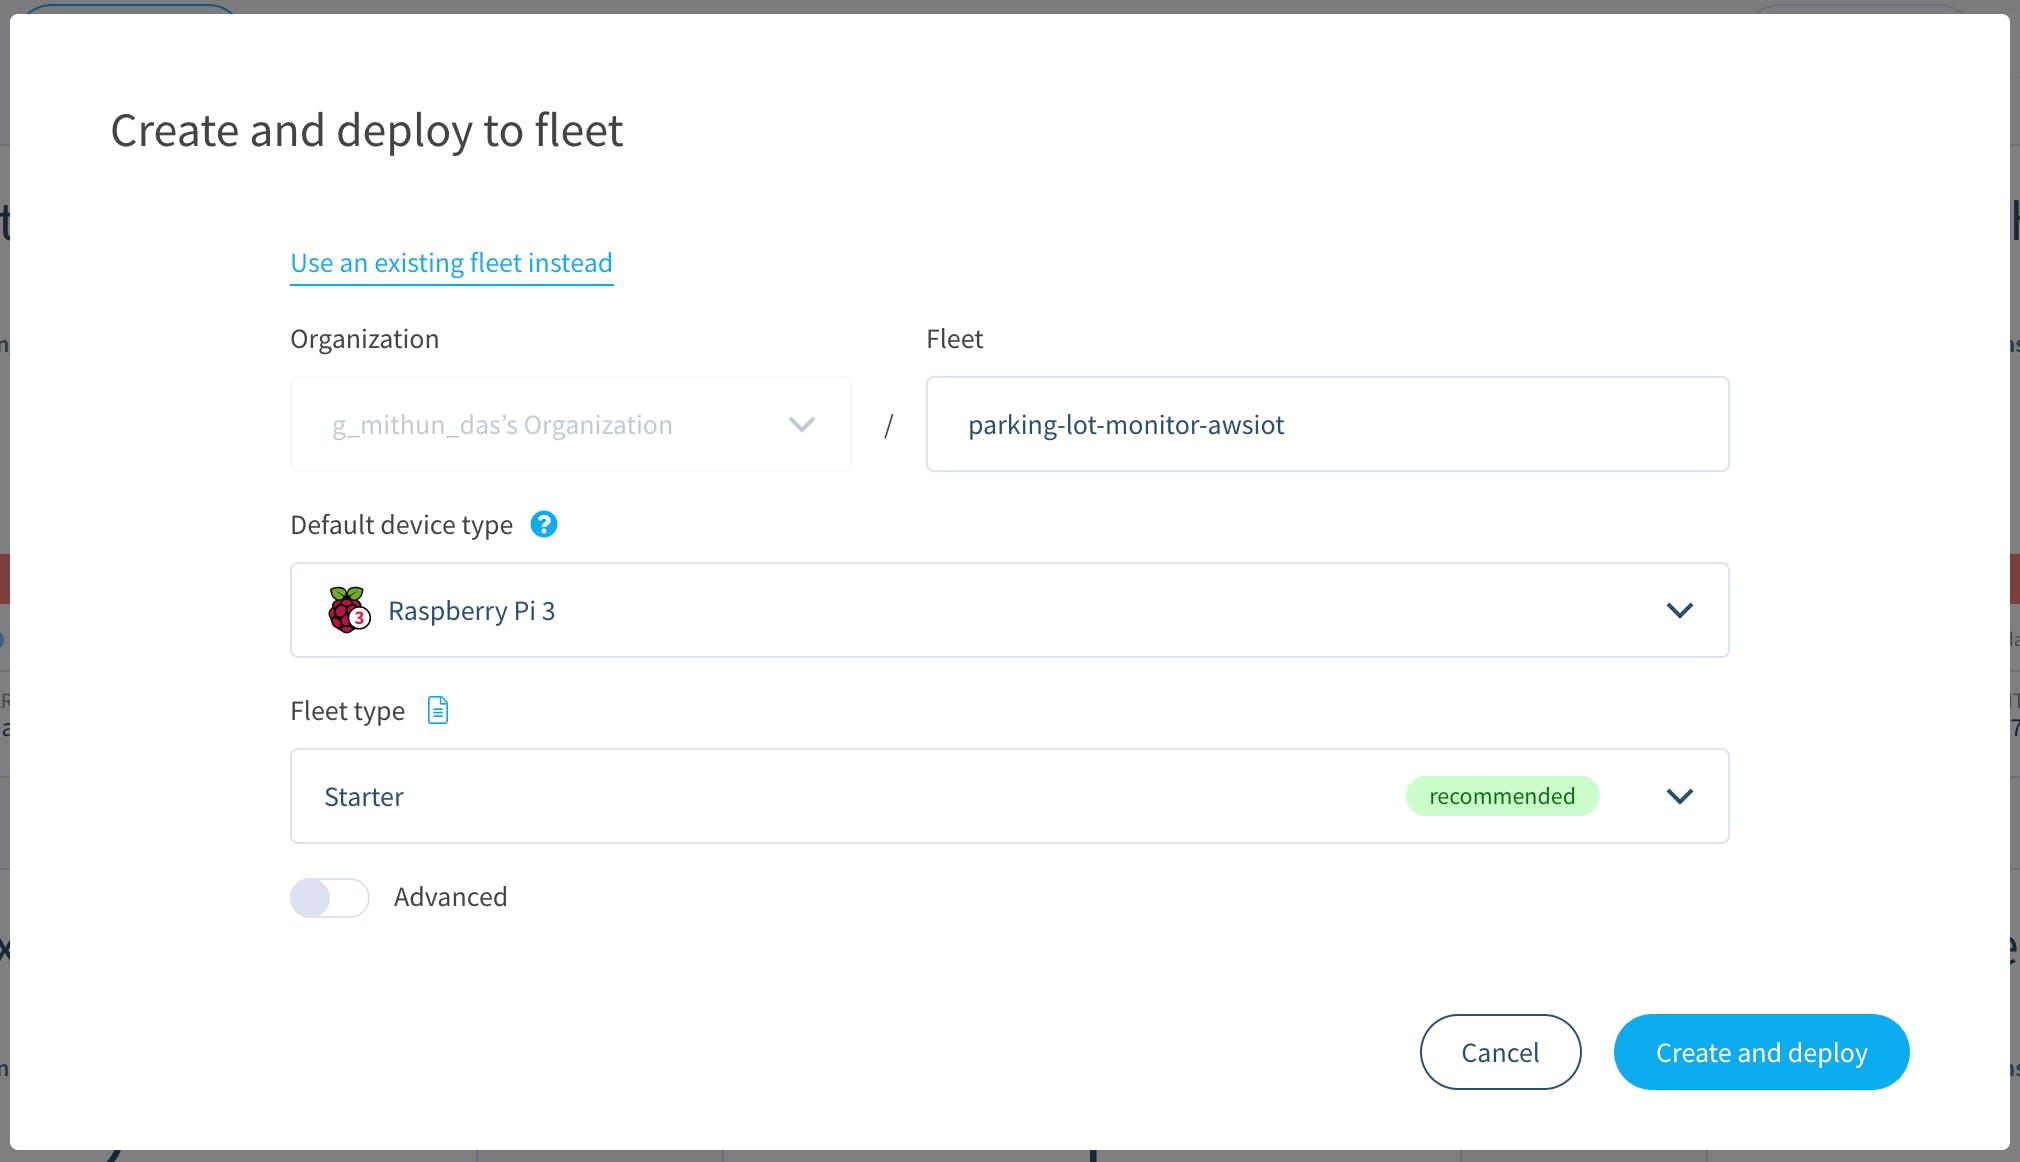
Go to my GitHub project and click on the deploy-with-balena button as given below, which will help you to deploy your application to balenaCloud and then to your Raspberry Pi in one click!

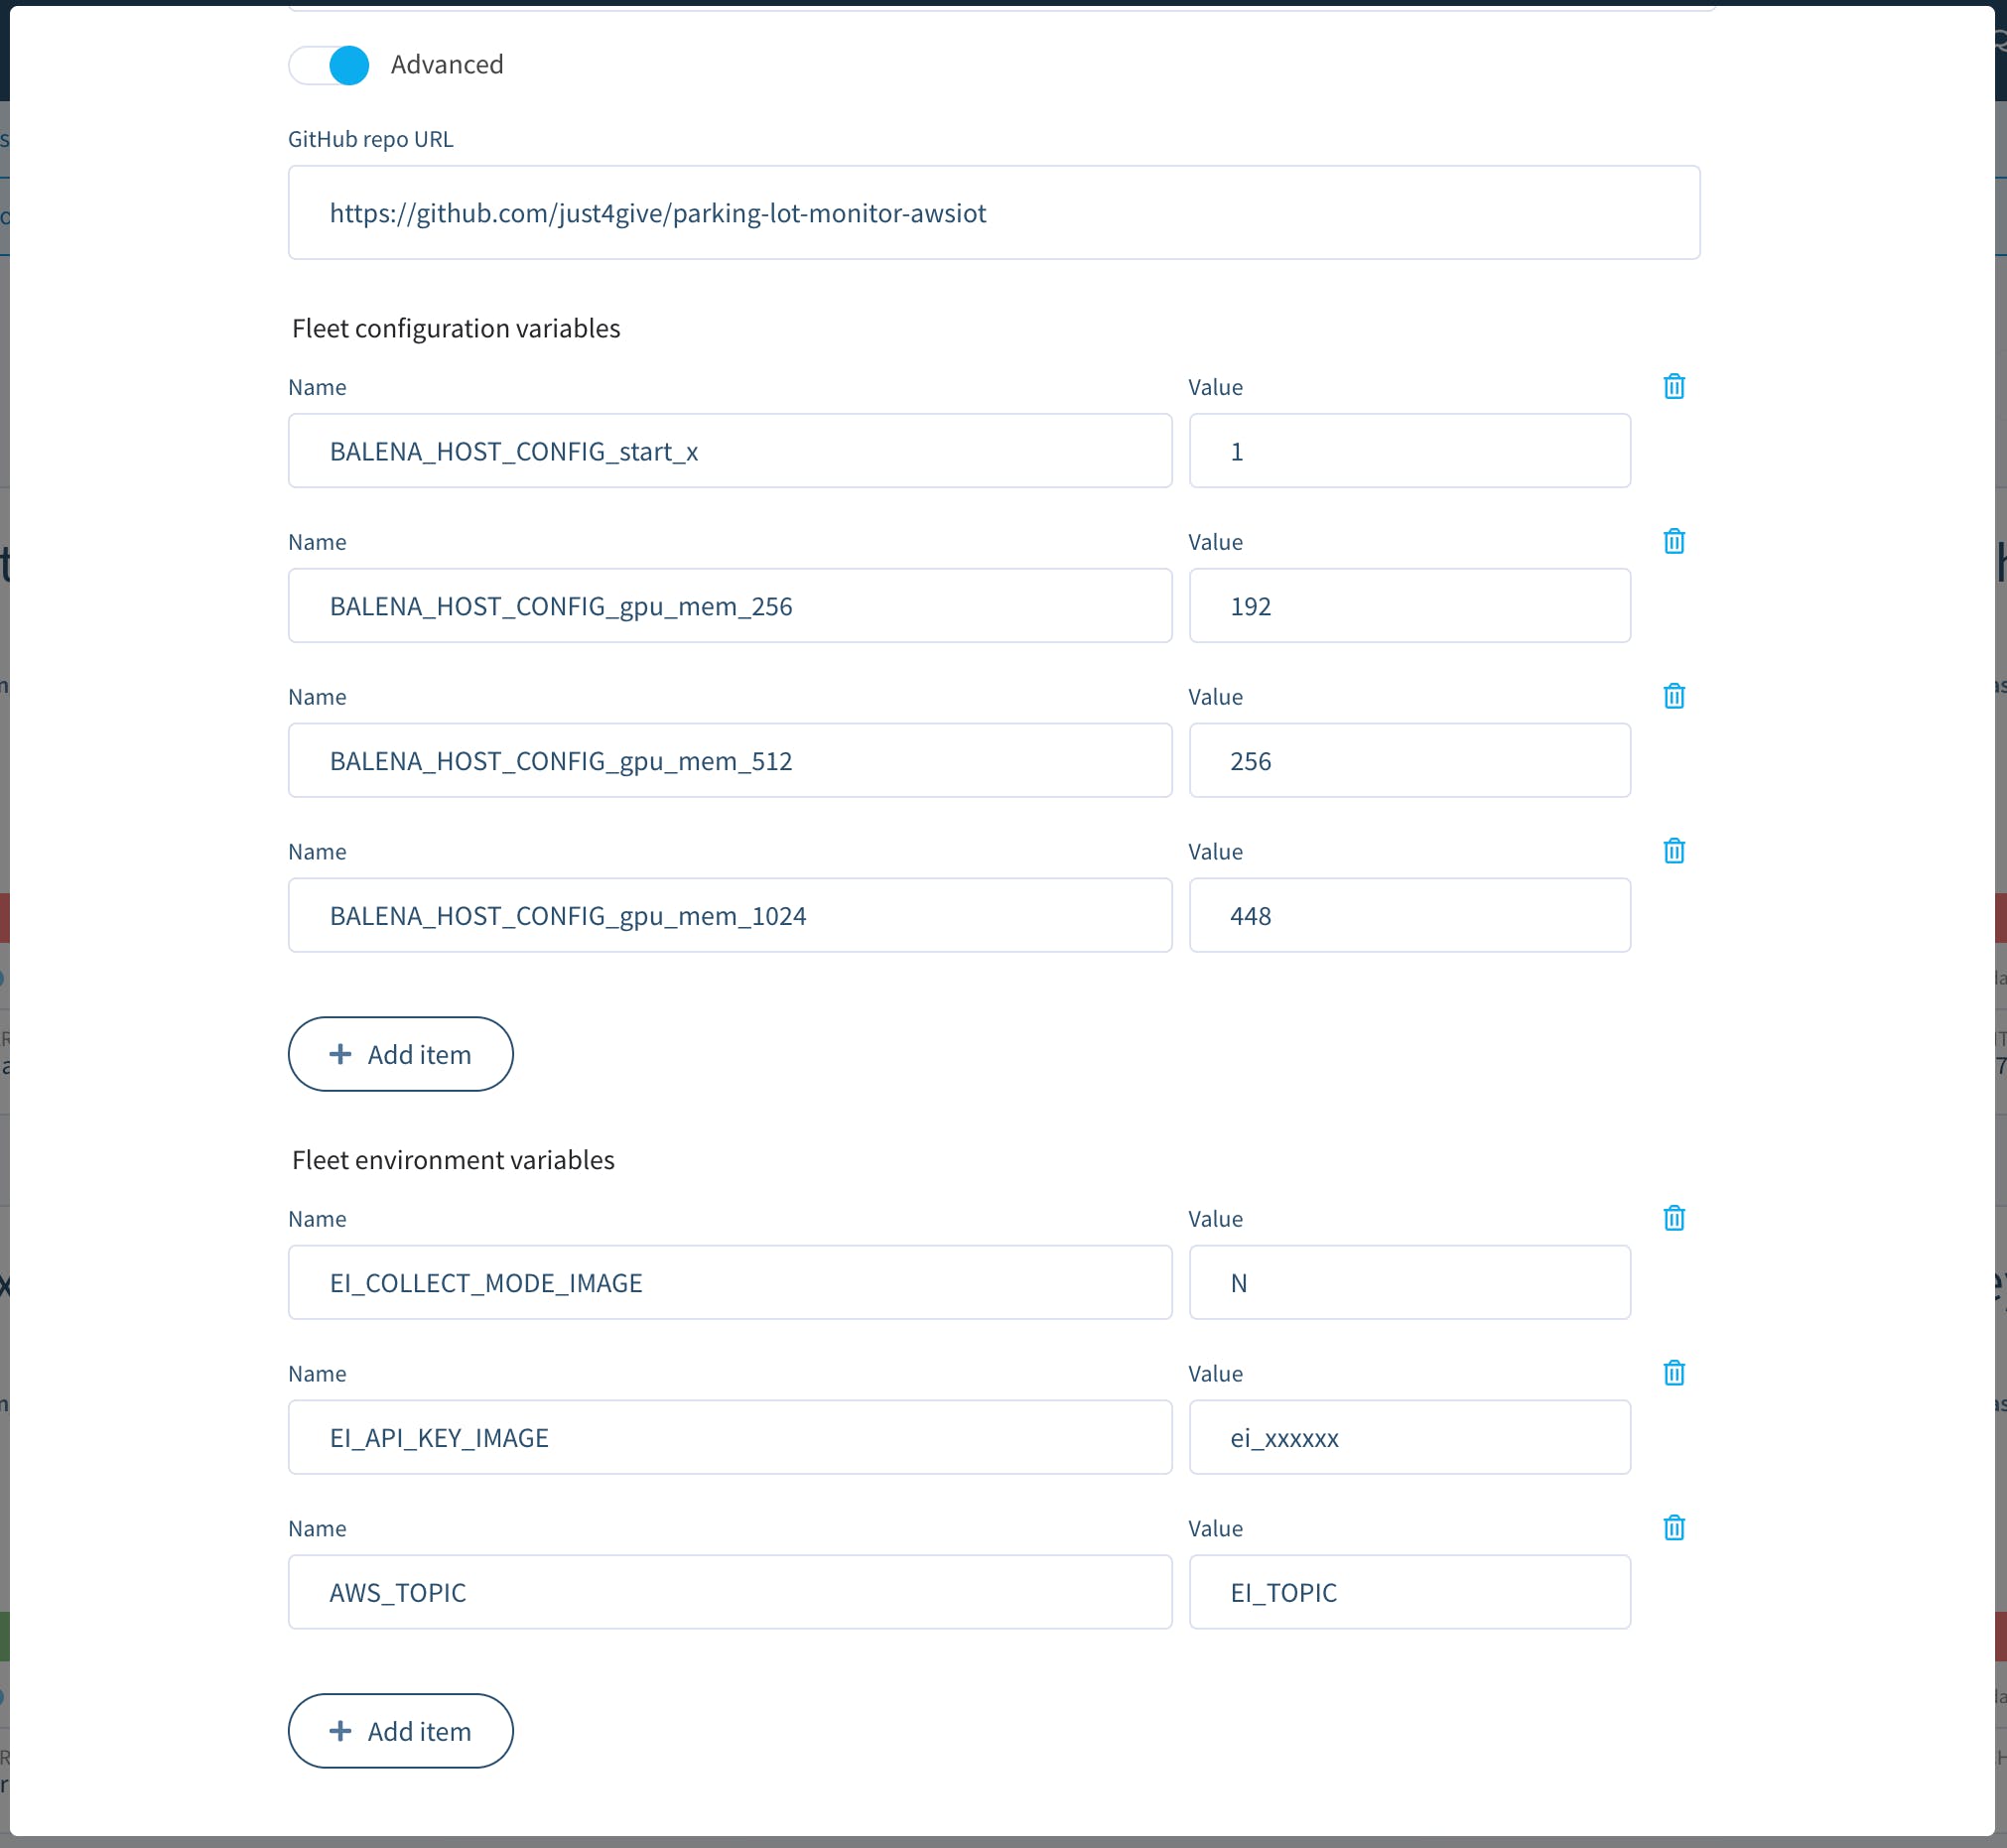
On the popup modal, select your device type (Raspberry Pi 3 or 4) and toggle "Advanced" switch.
That should expand the fleet variables section. Paste API key from Edge Impulse Studio under EI_API_KEY_IMAGE. Set collection mode to "Y" and make sure your EI_TOPIC is same as your used during device registration.
Then click on the "Create and deploy" button. In a moment, you should see your fleet on Balena Cloud account. You should see a button “+ Add device.” Clicking on that should open a modal. Choose Ethernet+WiFi, enter your WiFi SSID and password. Then click on "Download balenaOs" button. This should download the image as a zip file. Flash this image on a SD card using Balena Etcher. Put the SD card on Raspberry Pi 3 and plug the device to power. Wait for five to 10 minutes and your device should come online on balenaCloud.
Build model with Edge Impulse
To quickly get started you can fork my project or continue reading.
Once your device is online, you should see below log on balena cloud which indicates your device is connected to Edge Impulse.
ei-processing COLLECTION MODE Yei-processing Edge Impulse Linux client v1.2.10ei-processingei-processing [SER] Using camera Microsoft® LifeCam HD-3000 starting...ei-processing [SER] Connected to cameraei-processing [WS ] Connecting to wss://remote-mgmt.edgeimpulse.comei-processing [WS ] Connected to wss://remote-mgmt.edgeimpulse.comNow head over to EI Studio and navigate to Data aquisition page. On the right, you should see "Record new data" section and you will also notice feed from your camera.
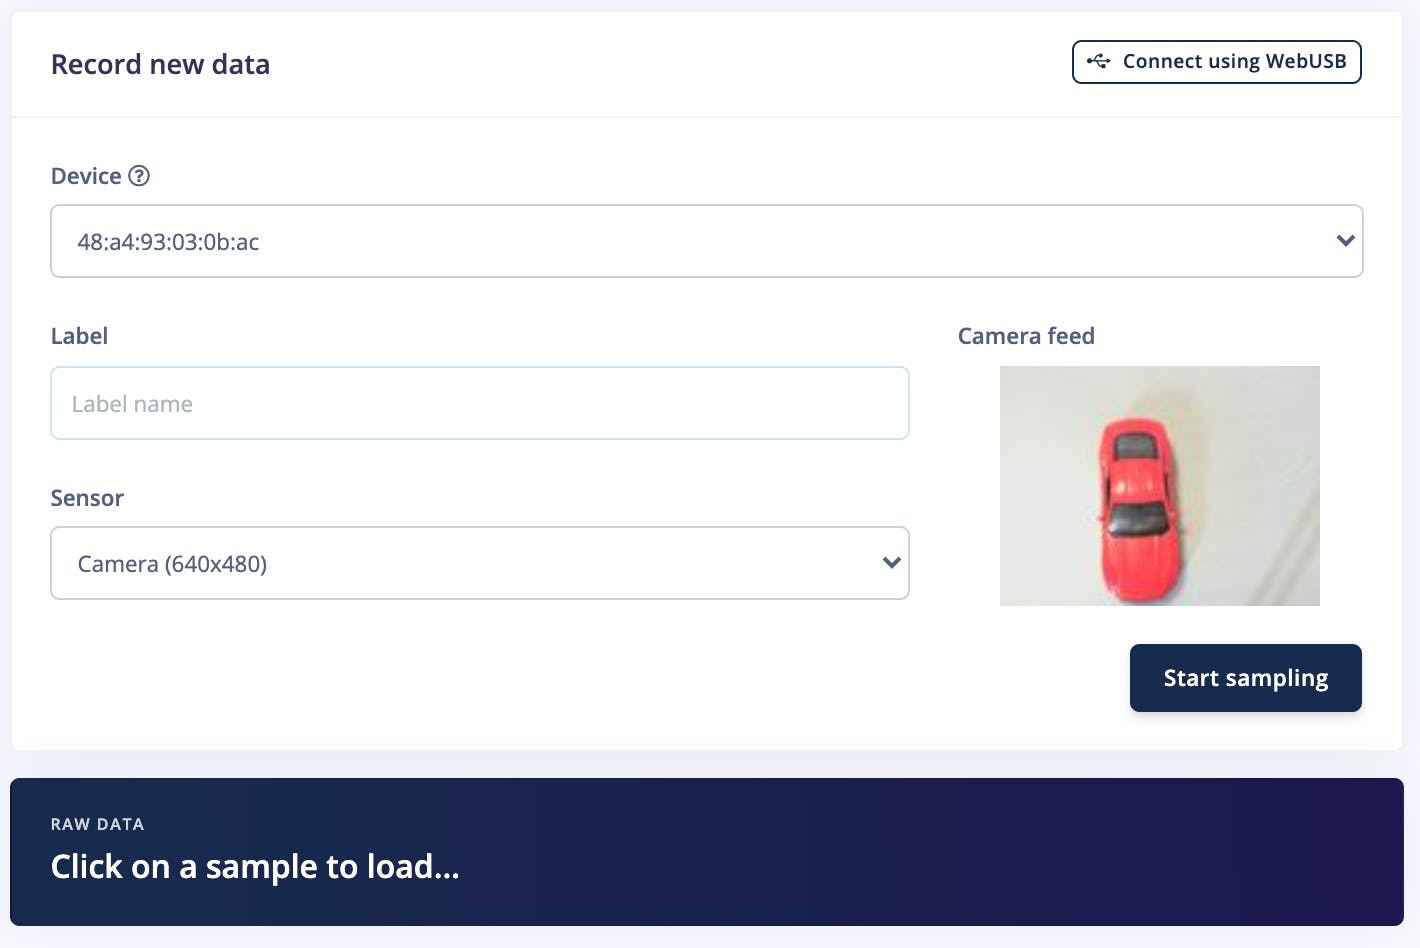
Click on "Start sampling" to capture the image. Capture lot of images of cars and some random objects such as person, bike, motorcycle etc. In my project I have used some toy cars and some lego humans. Collect at least 20 cars and 20 other images. After you capture the images, you should see them under "Labeling queue" tab. Click on that and you should see the first image you captured.
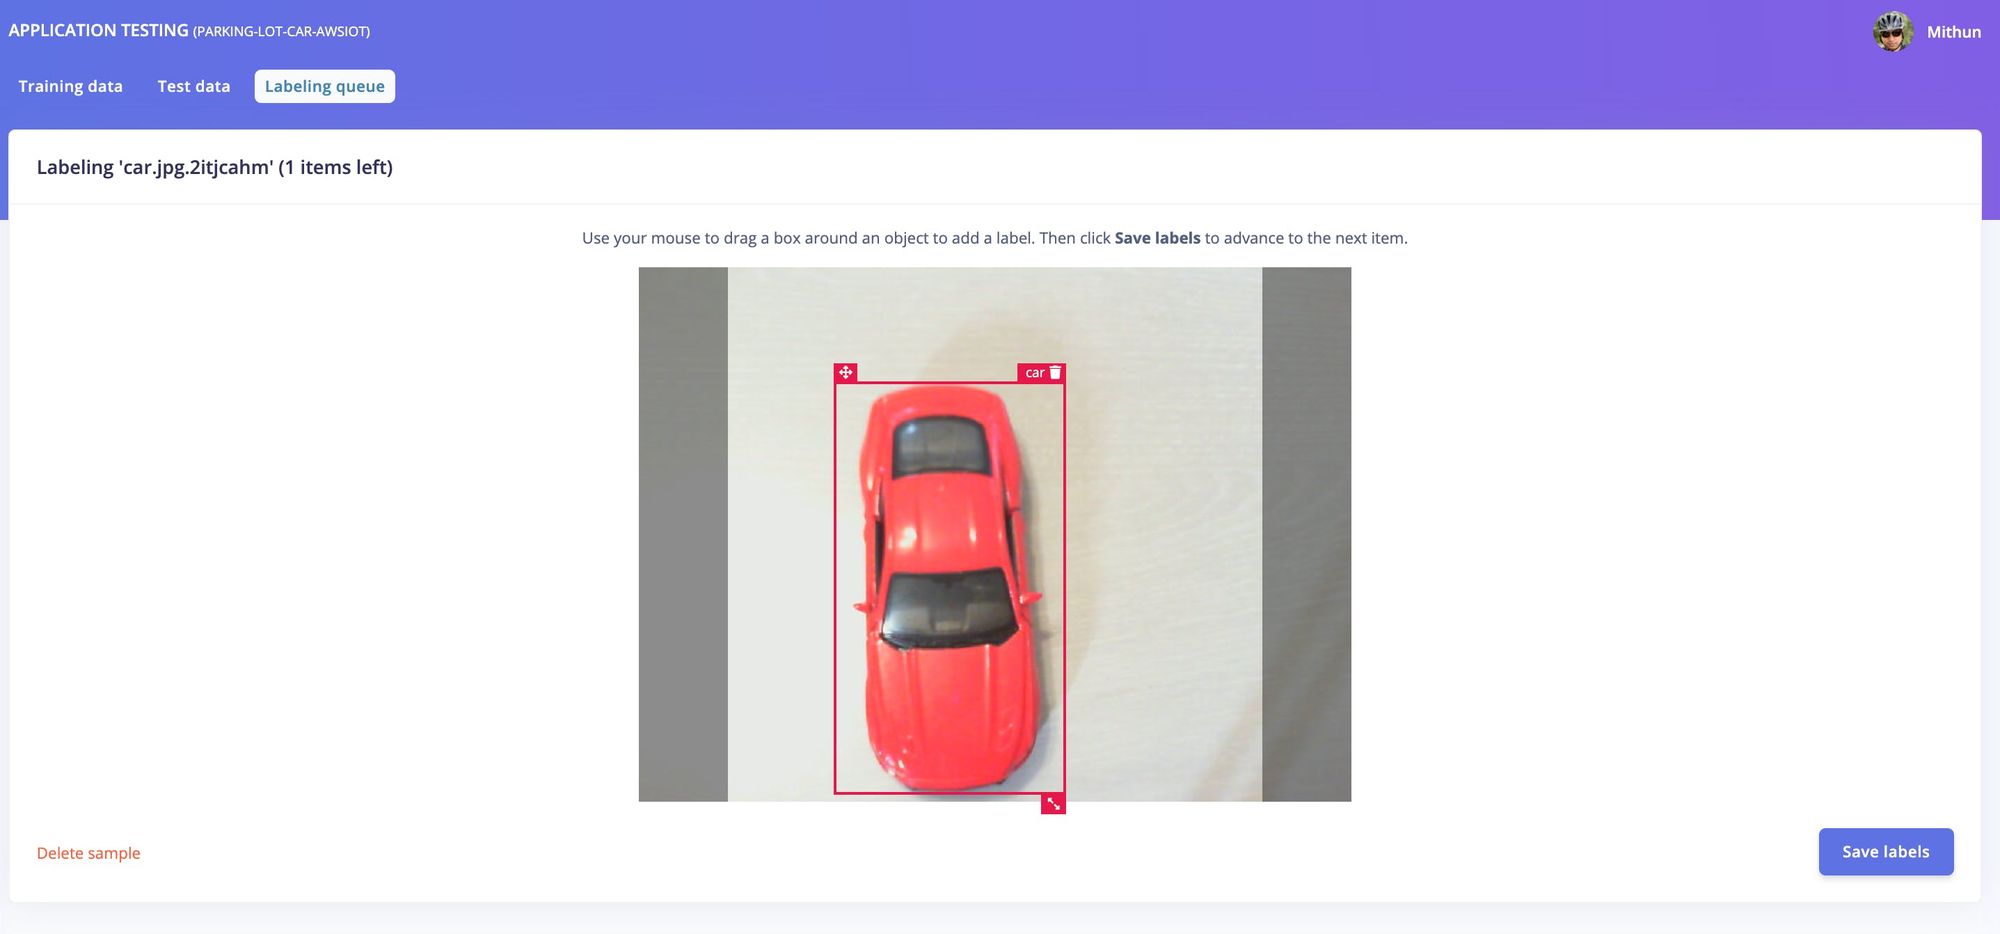
Drag your mouse over the object and label it. Repeat for all the images. We have two labels - car and unknown.
Watch this YouTube video from Edge Impulse CTO Jan Jongboom for a detailed step-by-step instructions to train and build your model.
Once your model is trained, head over to balena cloud account. Navigate to fleet variables page (Not device variables) and change EI_COLLECT_MODE_IMAGE to N.
Your device will be restarted. See the logs on balenaCloud. The Edge Impulse model will be automatically downloaded on your device and ready for object detection.
ei-processing COLLECTION MODE Nei-processing Edge Impulse Linux runner v1.2.10ei-processingei-processing [RUN] Downloading model...ei-processing [RUN] Downloading model OKei-processing [RUN] Stored model in /usr/src/app/modelfile.eimei-processing AWS IOT PUB-SUB Exampleei-processing MODEL: /usr/src/app/modelfile.eimei-processing Loaded runner for "Mithun / parking-lot-car-awsiot"ei-processing Looking for a camera in port 0:ei-processing Camera V4L2 (480.0 x 640.0) found in port 0ei-processing Looking for a camera in port 1:ei-processing [ WARN:0] global /tmp/pip-wheel-qd18ncao/opencv-python/opencv/modules/videoio/src/cap_v4l.cpp (893) open VIDEOIO(V4L2:/dev/video1): can’t open camera by indexei-processing Looking for a camera in port 2:ei-processing [ WARN:0] global /tmp/pip-wheel-qd18ncao/opencv-python/opencv/modules/videoio/src/cap_v4l.cpp (893) open VIDEOIO(V4L2:/dev/video2): can’t open camera by indexei-processing Looking for a camera in port 3:ei-processing [ WARN:0] global /tmp/pip-wheel-qd18ncao/opencv-python/opencv/modules/videoio/src/cap_v4l.cpp (893) open VIDEOIO(V4L2:/dev/video3): can’t open camera by indexei-processing Looking for a camera in port 4:ei-processing [ WARN:0] global /tmp/pip-wheel-qd18ncao/opencv-python/opencv/modules/videoio/src/cap_v4l.cpp (893) open VIDEOIO(V4L2:/dev/video4): can’t open camera by indexei-processing Camera V4L2 (480.0 x 640.0) in port 0 selected.Now place one or two cars in front of the camera and see the logs. You will notice your device counts number of cars it sees. How cool is that?
ei-processing Camera V4L2 (480.0 x 640.0) in port 0 selected.ei-processing 1 Cars found.ei-processing Received a new message:ei-processing b’{"uuid": "49418b480e408ef9c632fc6cb25ebfdc", "cars": 1}’ei-processing from topic:ei-processing EI_TOPICei-processing --------------ei-processingei-processing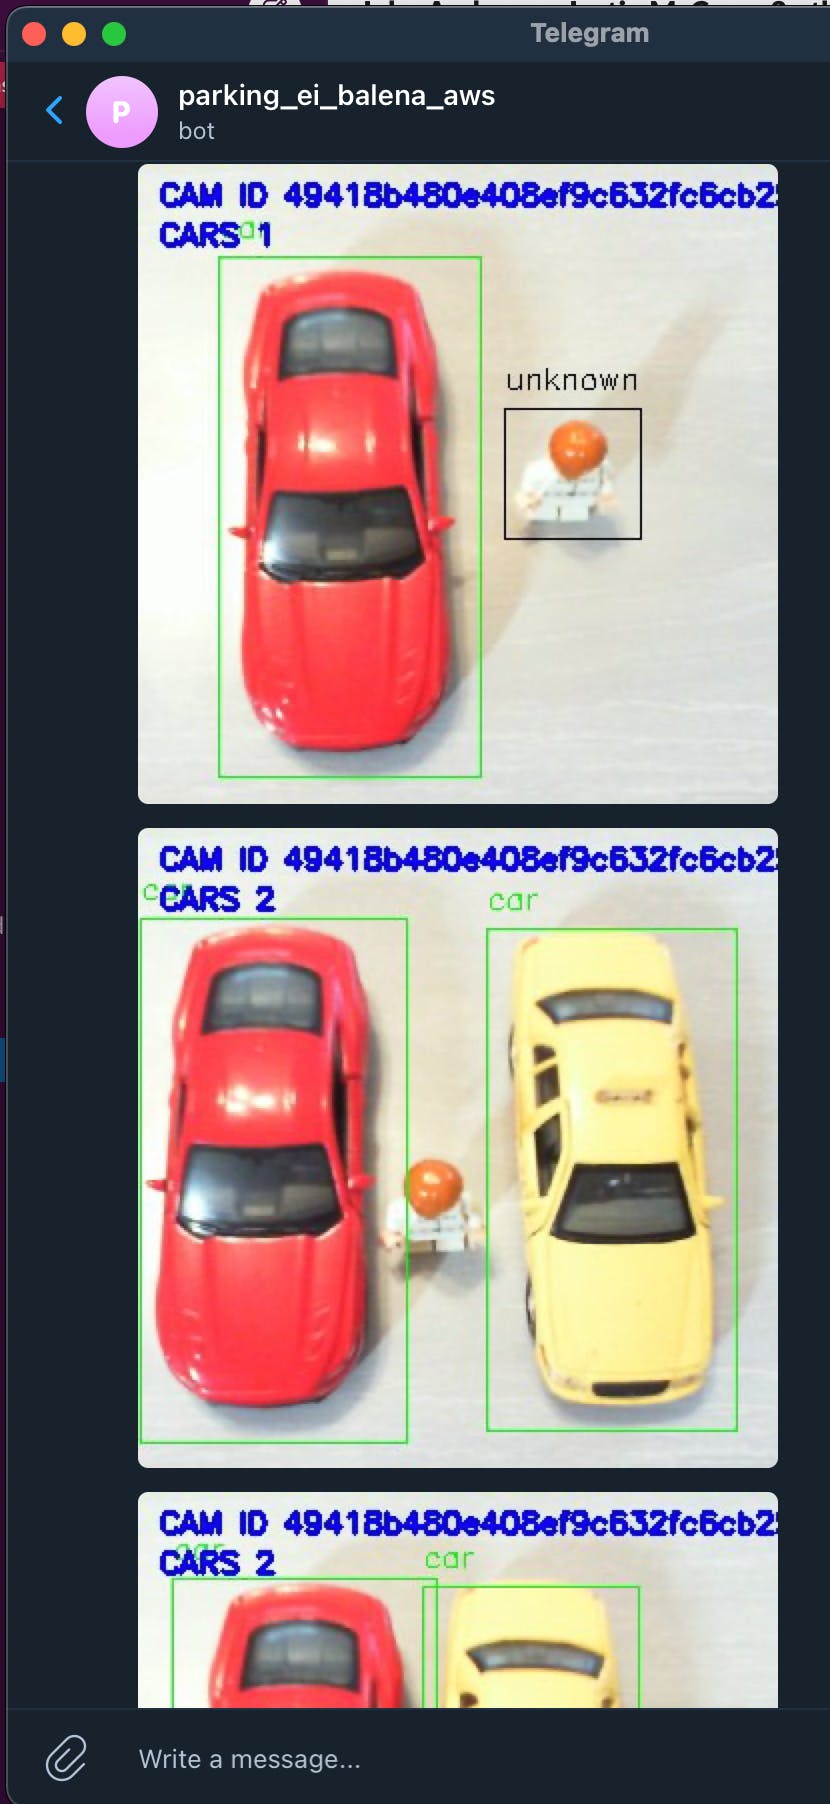
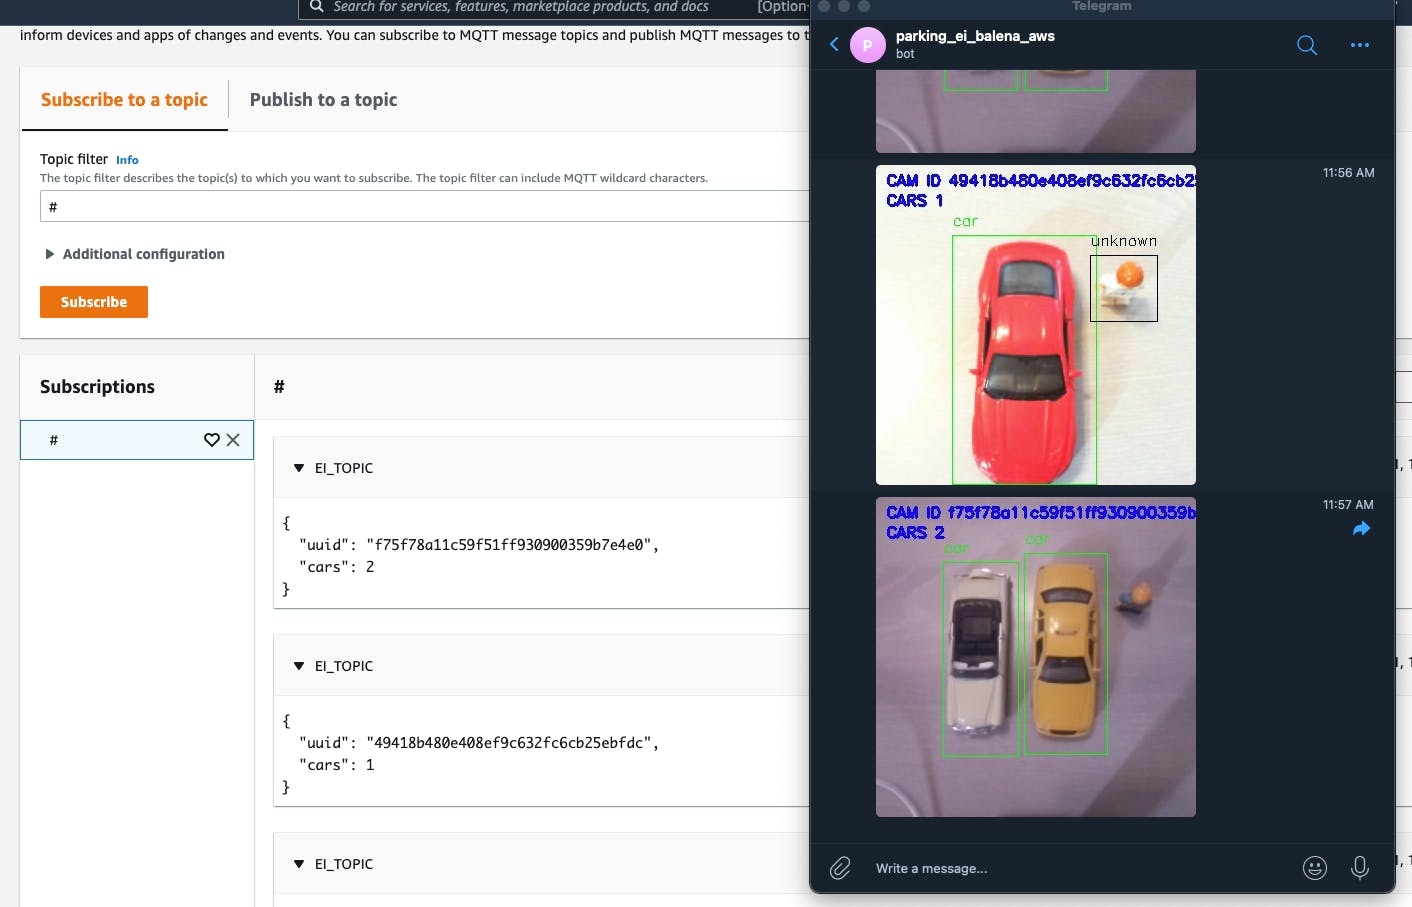
For the purpose of visual feedback, I have integrated Telegram bot with this project. This step is optional for you. But, if you want to add Telegram bot, you need to get bot access token and chat ID. Once you obtain them, add them in fleet variable.
TG_CHAT_IDTG_TOKENCheck data on AWS
You have noticed from the log that, when a car is detected, data is sent to AWS IoT topic. Your device connects to AWS IoT using the certificates you created during device registration process. Head over to your AWS console.
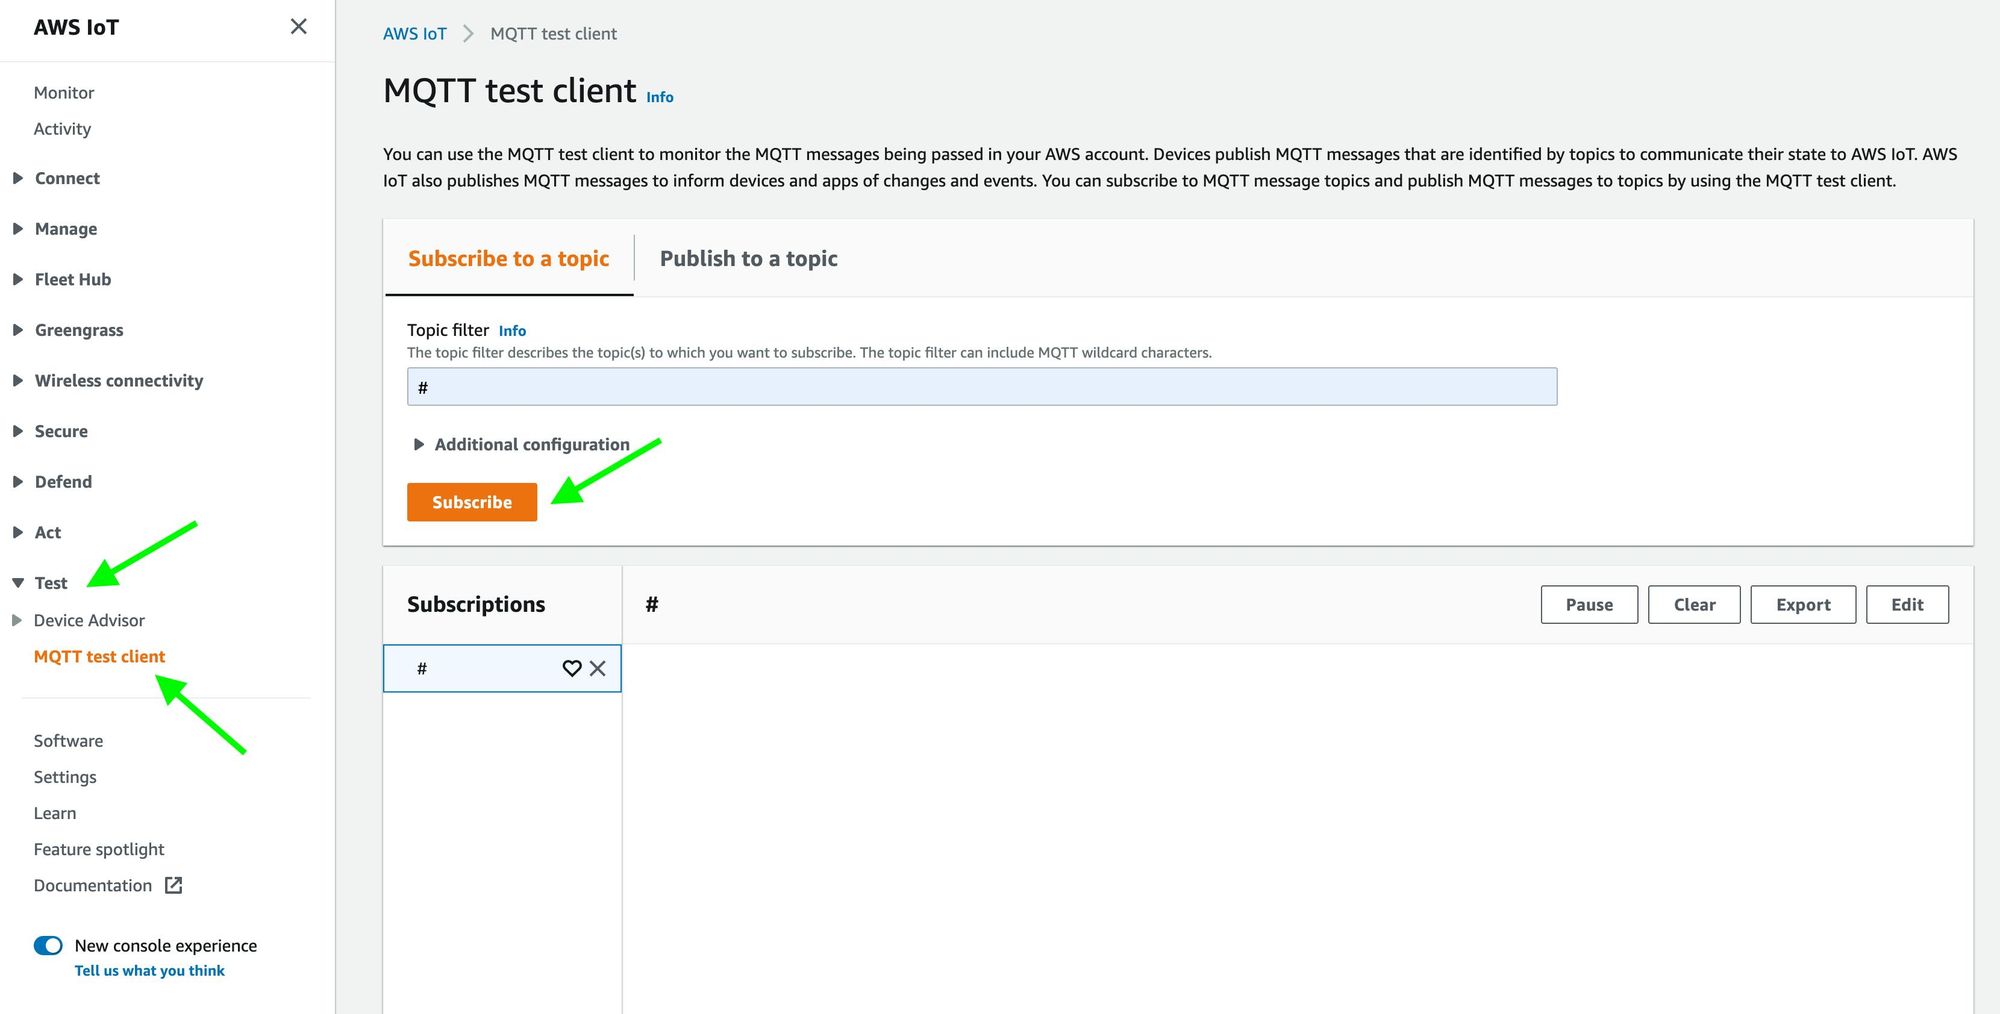
Go to IoT Core service and click on "Test" from left menu. Then click on “MQTT test client.” Enter # in topic filter text field and click on "Subscribe" button.
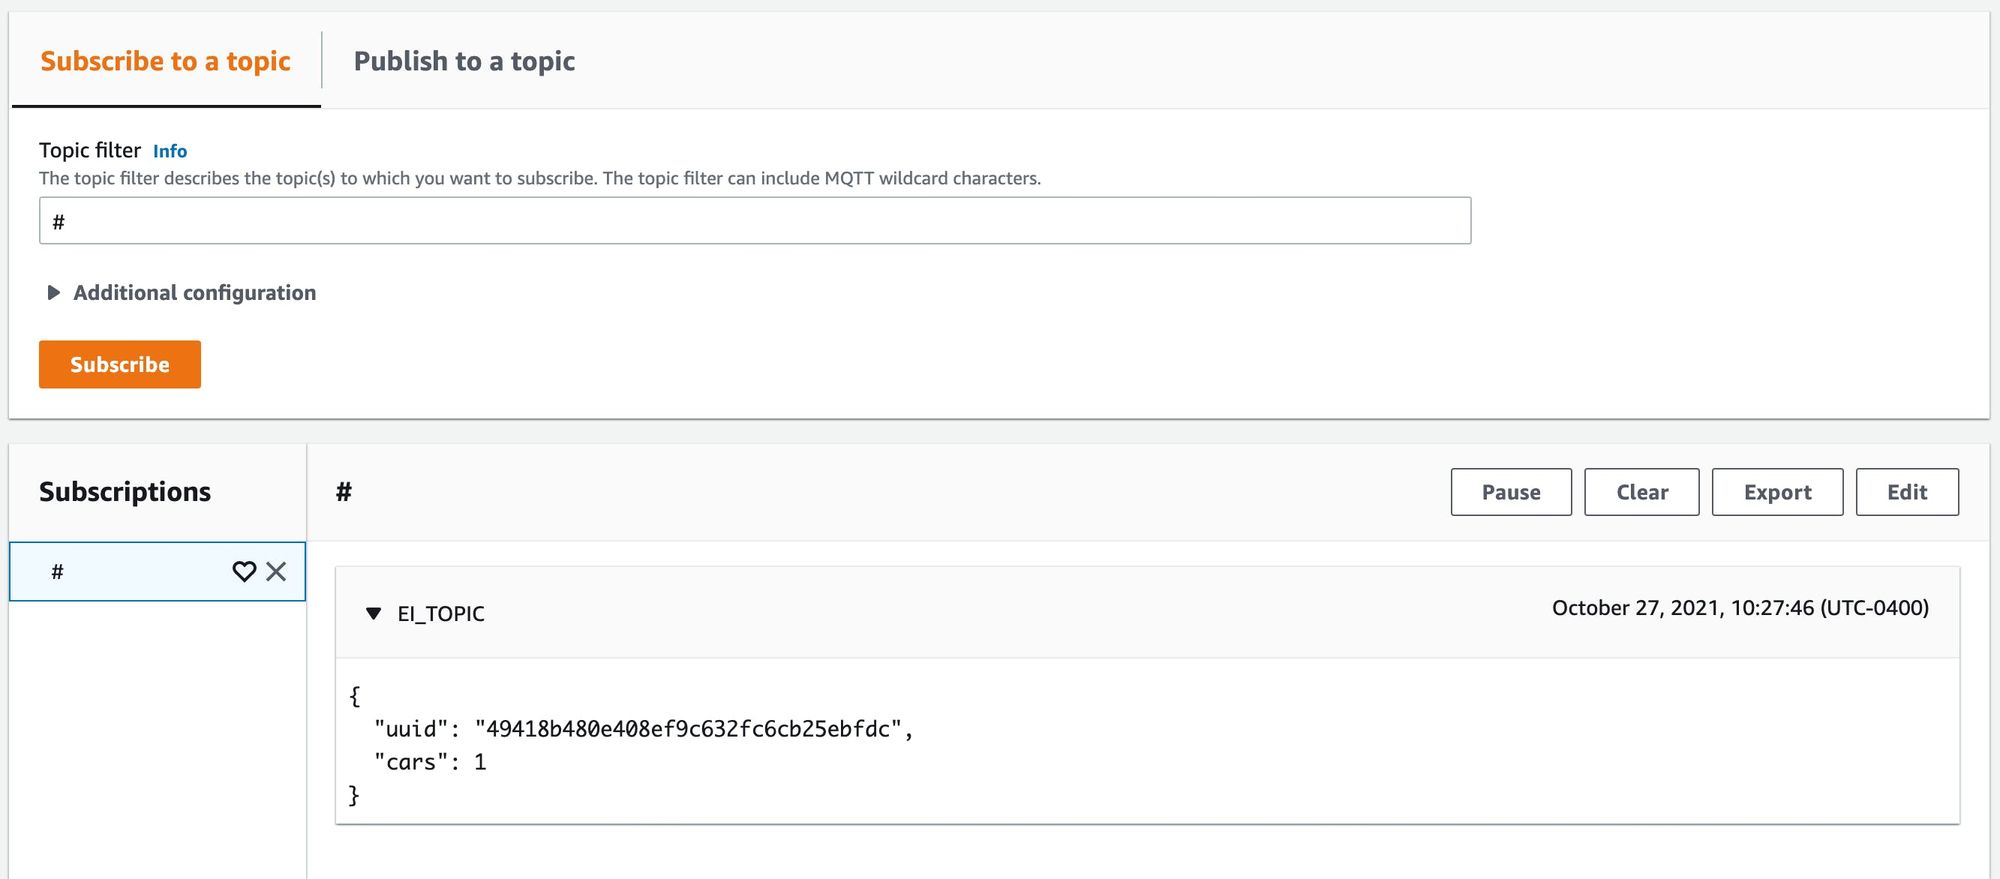
Within two minutes, you should receive data in your topic as below:
{"uuid": "49418b480e408ef9c632fc6cb25ebfdc","cars": 1}uuid is the device id which is unique to the device.
Scale by adding new devices
Now as we configured and deployed object detection model to our device, it’s time to see how we can add more devices to the fleet. This step is super simple and you already did before. From your balena fleet dashboard, click on "Add device" button. Choose your device type, enter WiFi credential, download the image, flash on the SD card, insert SD card to Raspberry Pi, and power on.
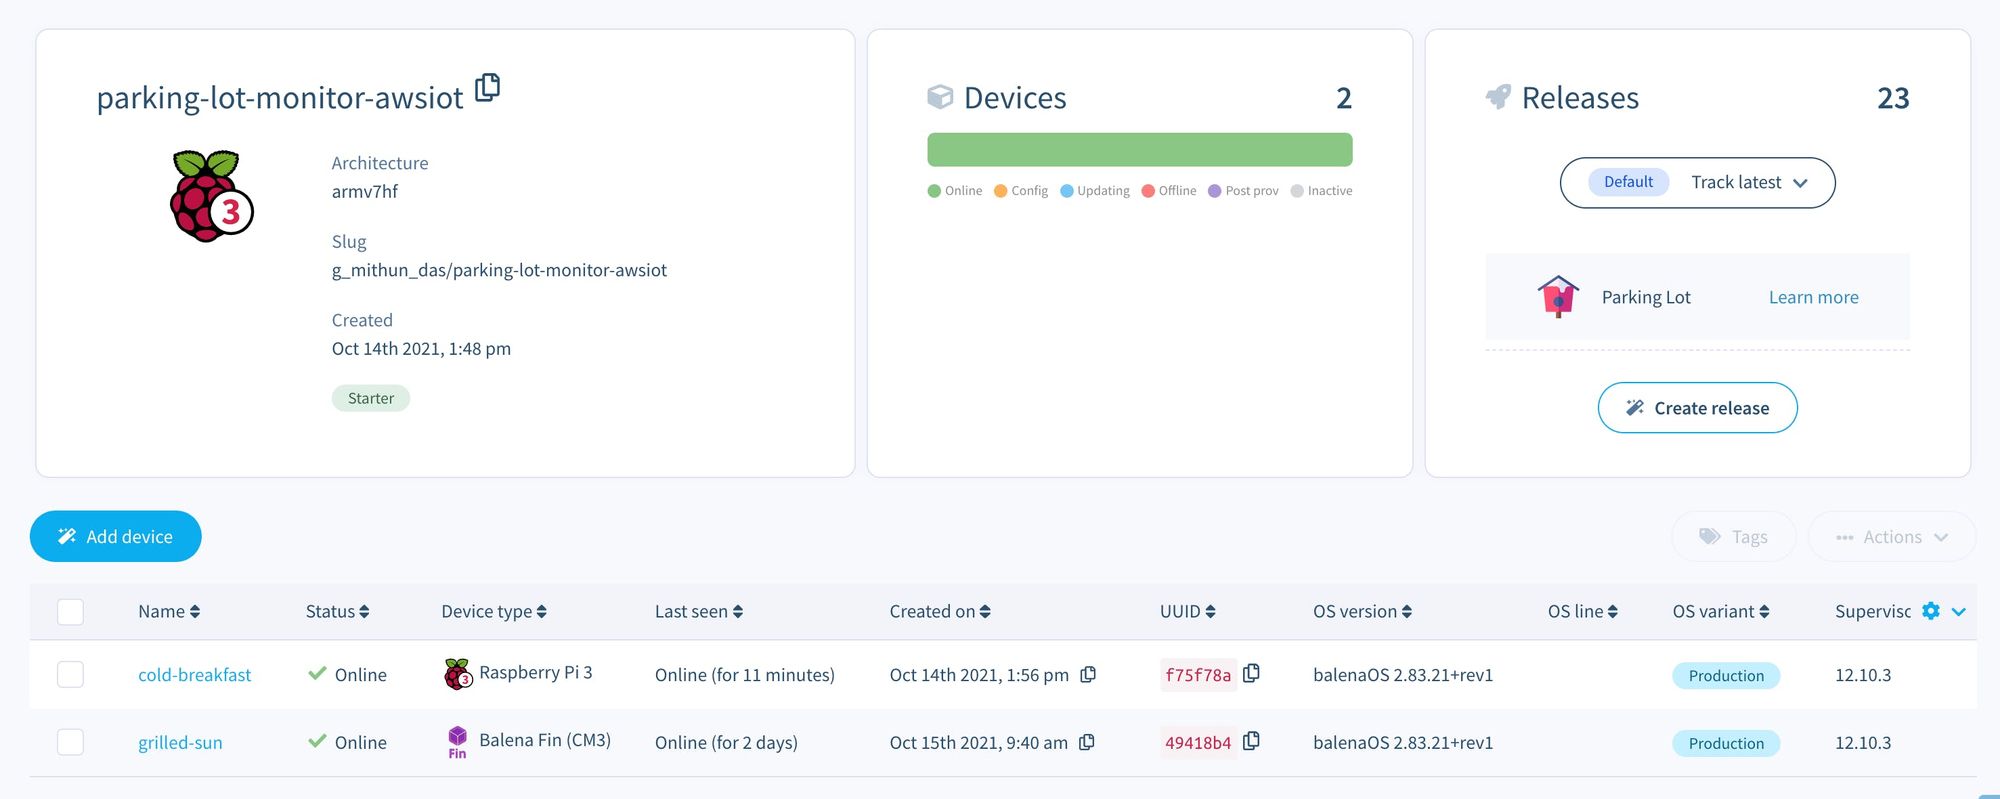
In a few minutes, a new device should show up on your fleet dashboard and be ready for object detection. It’s that simple! If you head over to AWS console, you will notice data coming from both the devices. Each device has unique uuid.
Extending the solution
We can do so much more with this proof of concept project as explained earlier and extend it to other parking-related use cases, such as the following:
As data is sent to AWS IoT, opportunities are endless. You can forward the data to IoT Event and build a fleet workflow using Lambda. You can trigger SMS/emails/push notifications using Amazon Pinpoint. You can ingest data to DynamoDB through AWS AppSync. You can build a web/mobile app using AWS Amplify and get real-time update and many more.