
Being able to classify movement signatures correctly is now pretty well achieved by most wearable or phone providers. Most of the MEMS sensors offer ready-to-use functions to detect walking, running, tap, double-tap or free-fall patterns but what if you want to detect specific movements for your niche market or for your custom application?

Before the arrival of machine learning, recognition and classification of movements were very hard and time-consuming tasks for embedded developers.
It was necessary to go through complex decision-tree algorithms based on the activation of specific thresholds at different time intervals.
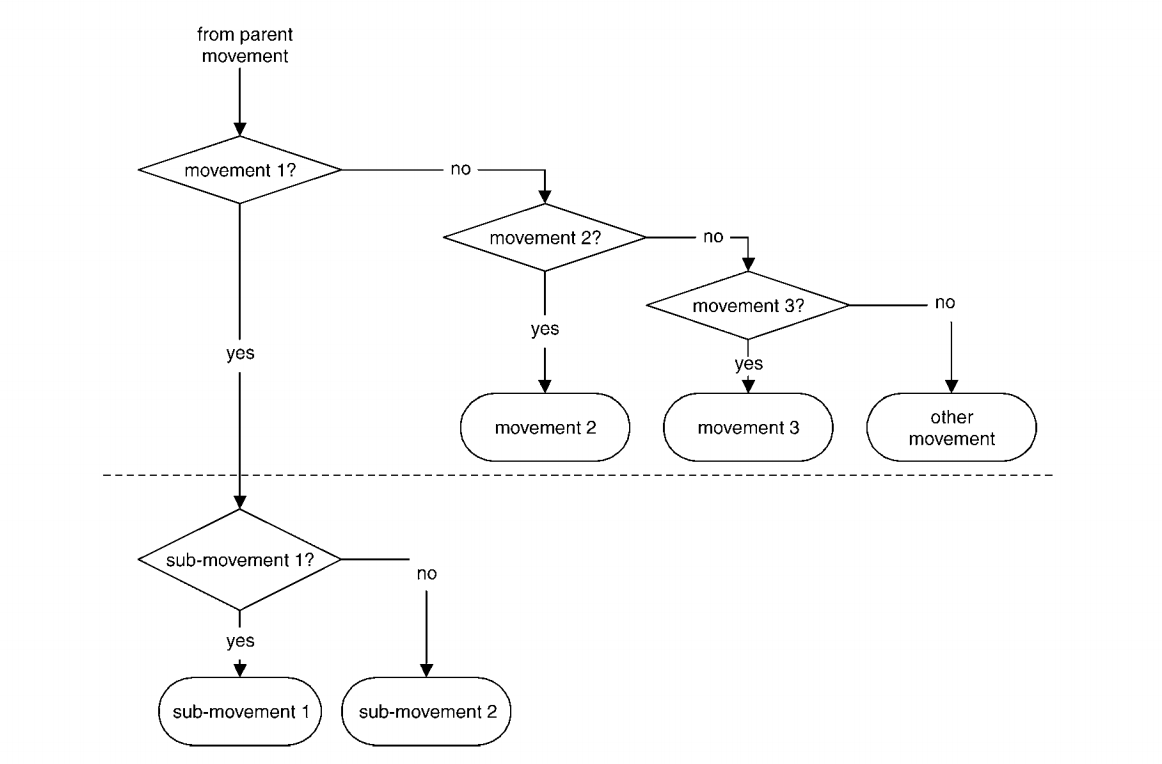
Later came pre-filtering techniques and ready-to-use functions available in MEMS motion sensors SDKs.
Fortunately for us, it is now much easier to classify movements using simple digital signal processing and basic neural networks. And even easier when using Edge Impulse.
This article is an overview of the workshop “Meet Your New Fitness Trainer," hosted by SparkFun using the Nordic nRF52840 MicroMod Processor Board.
The full tutorial is also available on GitHub and YouTube.
To be able to train a neural network to classify several movements using Edge Impulse, here are the needed steps to follow:
- Setting up your environment
- Collecting data
- Train your machine learning model
- Run your inference on the target
- Send your inference over Bluetooth
Data collection
Like for any machine learning project, to get good results, we need good data. Edge Impulse offers a robust solution to ingest data directly from the devices. And by collecting data directly from the devices themselves, you can make sure your model has been designed to perfectly suit the sensors that are going to be used in production.
The ‘data acquisition’ web page will display the raw data as you collect your samples.
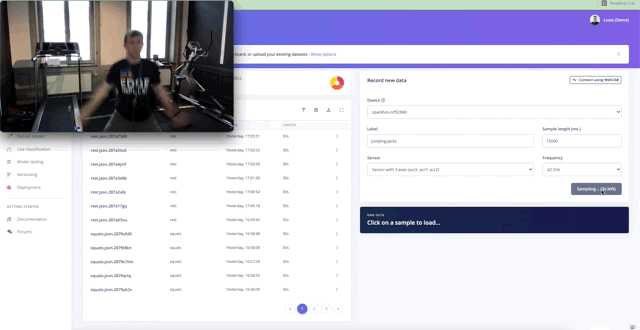
In total we collected 17m45s of data, well balanced between the 4 different classes and split between the training (80%) and testing (20%) dataset.
Training your machine learning model
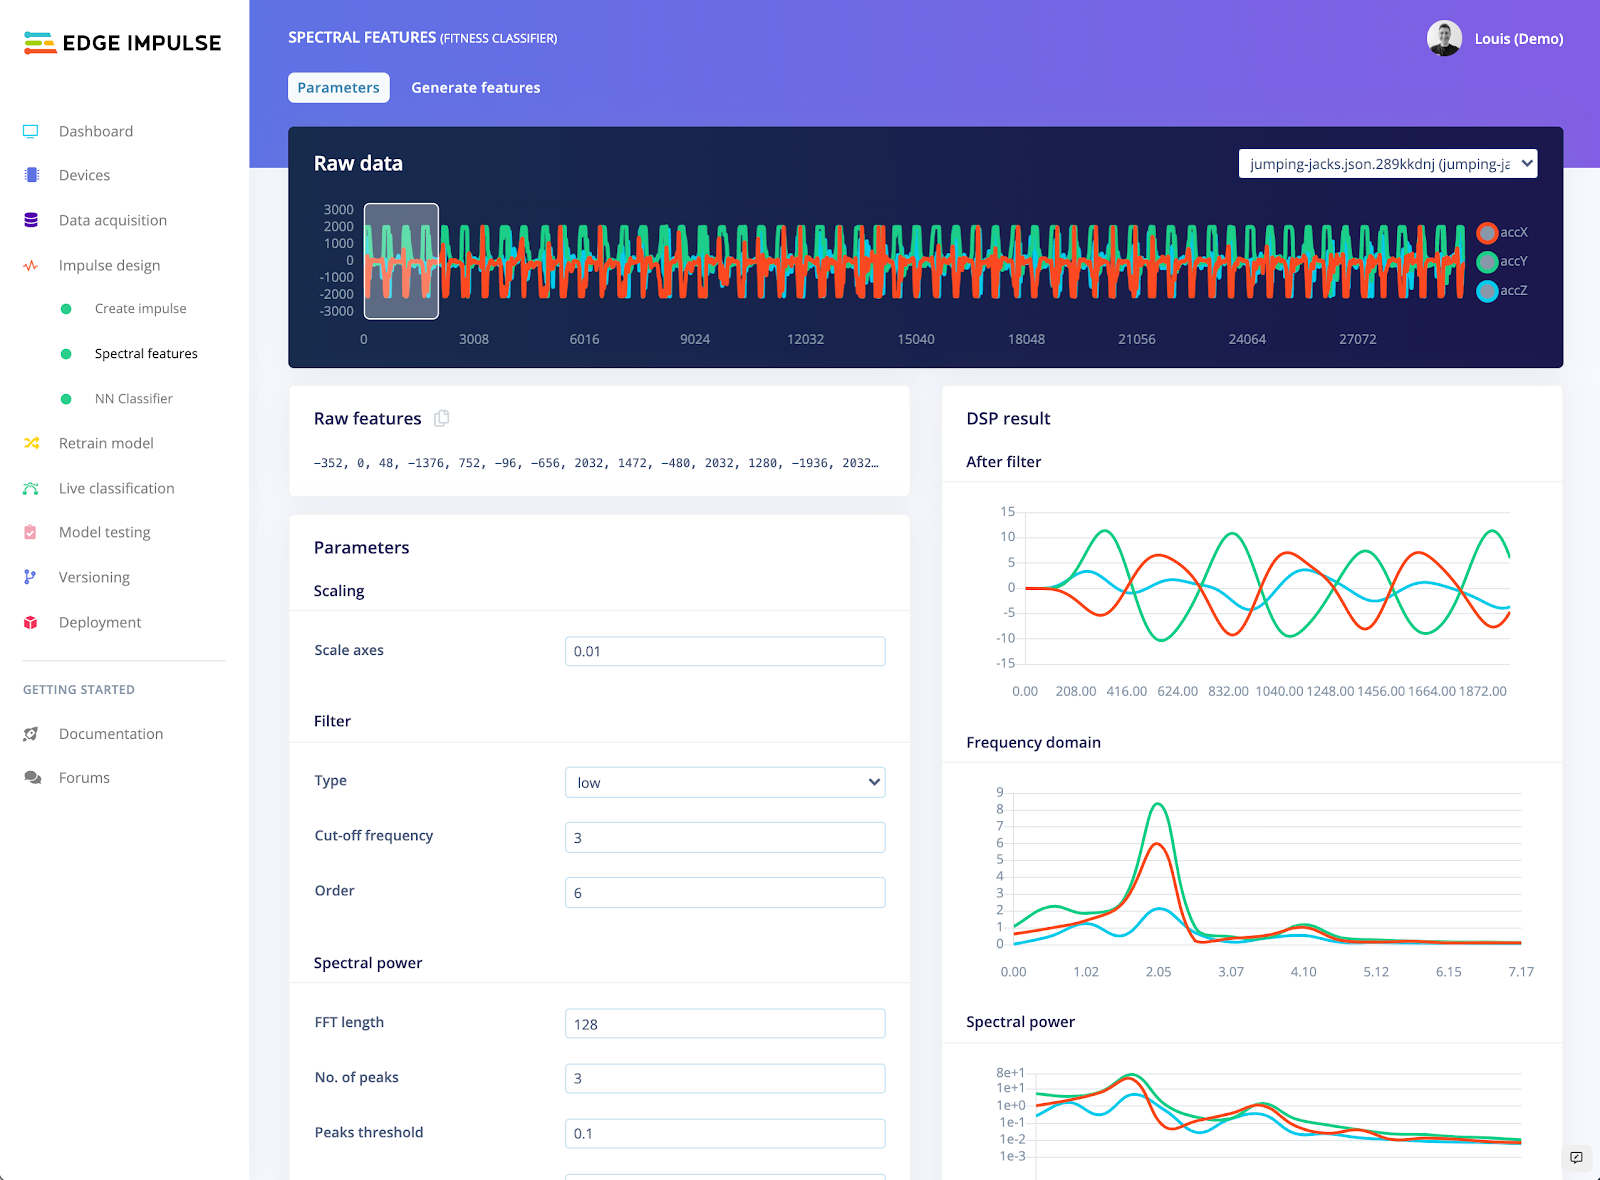
Next step is to create an impulse, which is a mix of digital signal processing and machine learning blocks.
For this use case, we were able to obtain good results using the spectral analysis DSP block and the neural network learning block.
The spectral analysis will generate meaningful features to pass to the neural network so it will be easier to train than when using the raw data.
Spectral features parameters:
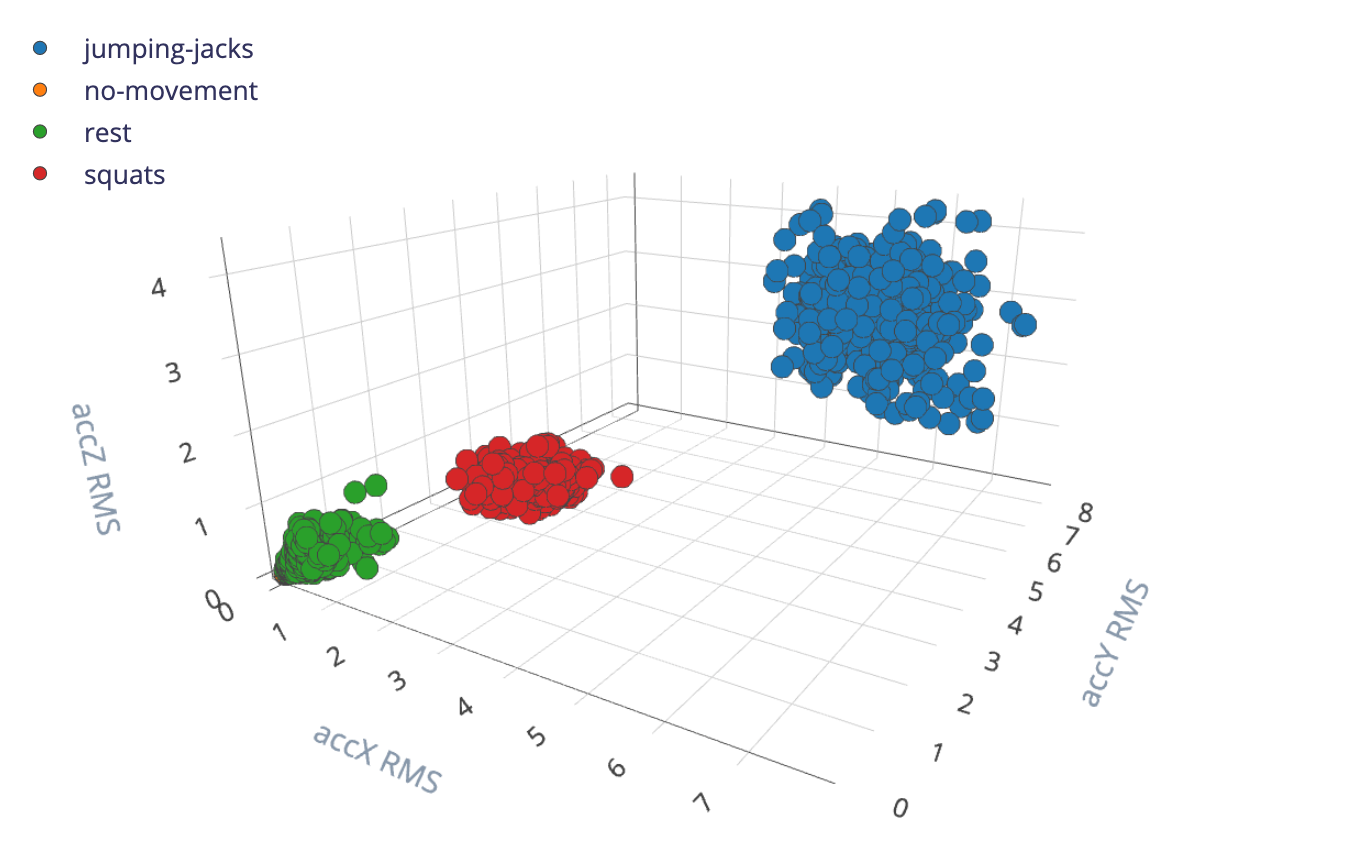
Using these parameters, you can easily get interesting clusters across your data samples.
As you can see below, the feature generation gives very distinct clusters. Having this kind of separation is great, it usually means that the neural network will easily learn and will be able to classify the classes with a good accuracy.
The neural network that worked best for our use case is a deep learning architecture with four layers:
- One dense layer of 16 neurons
- One dense layer of 8 neurons
- One dropout layer with a rate of 0.25
- One dense layer of 8 neurons
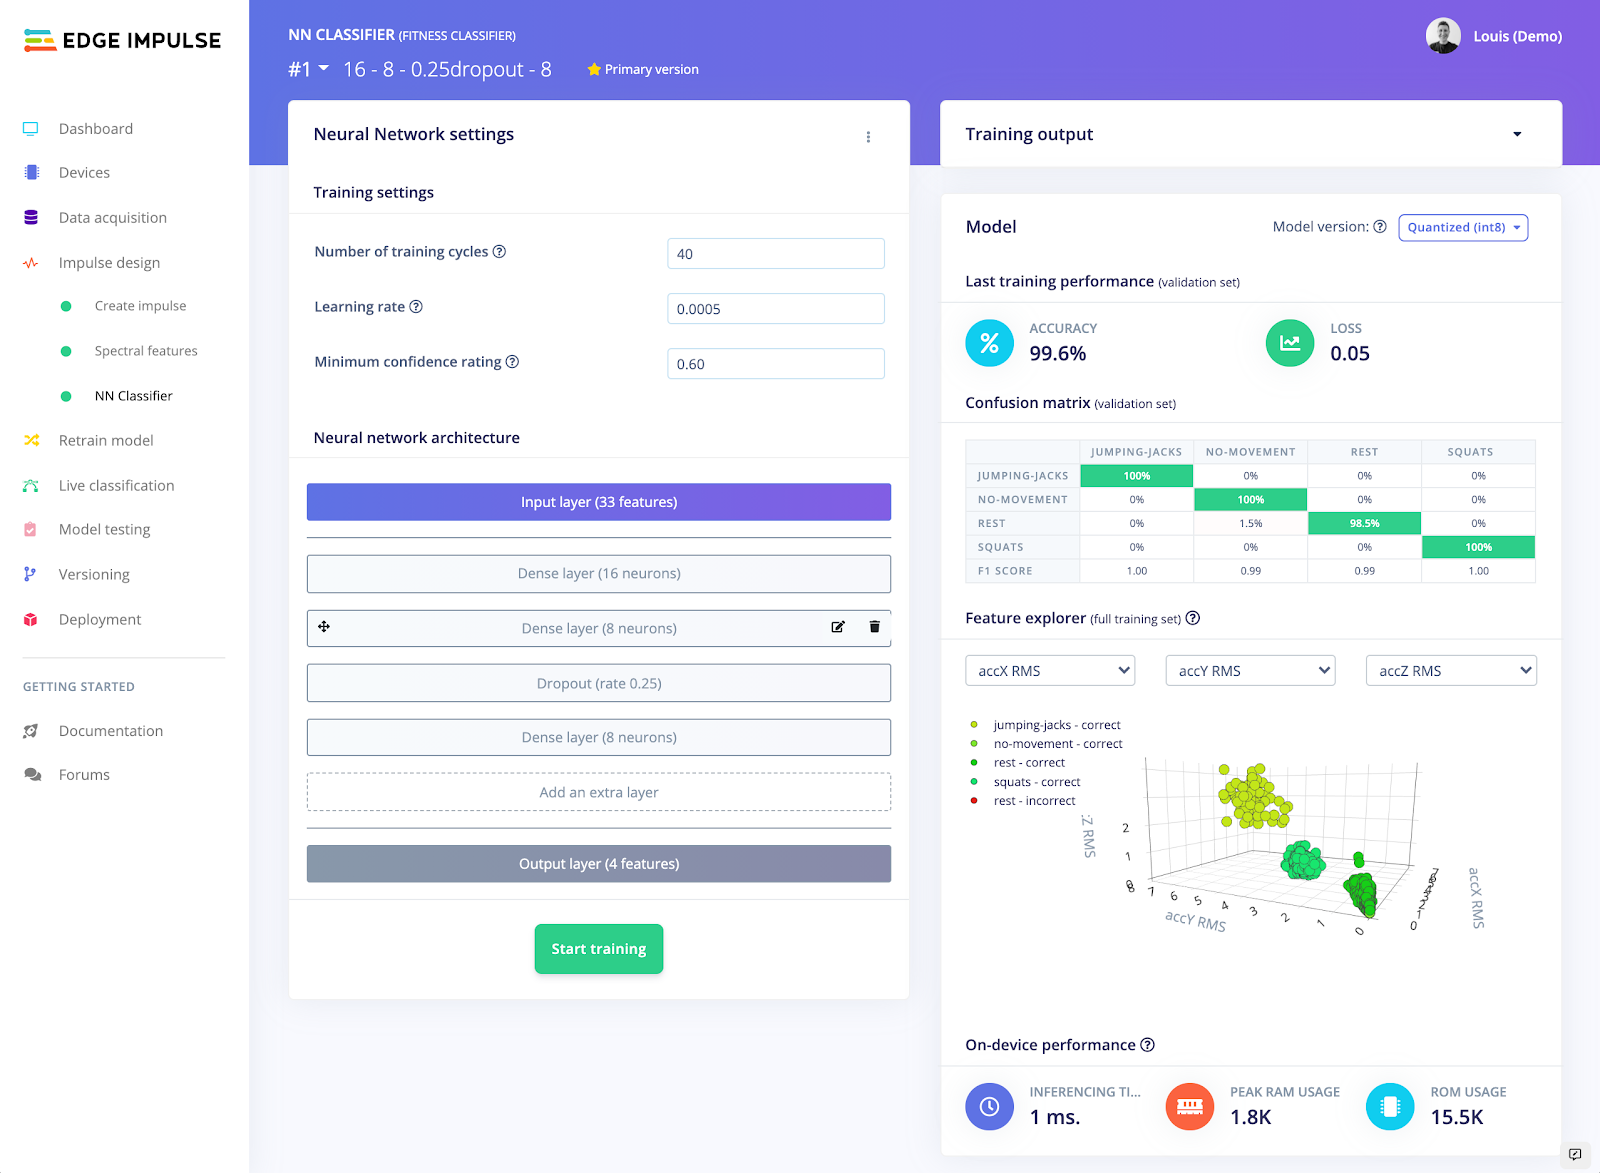
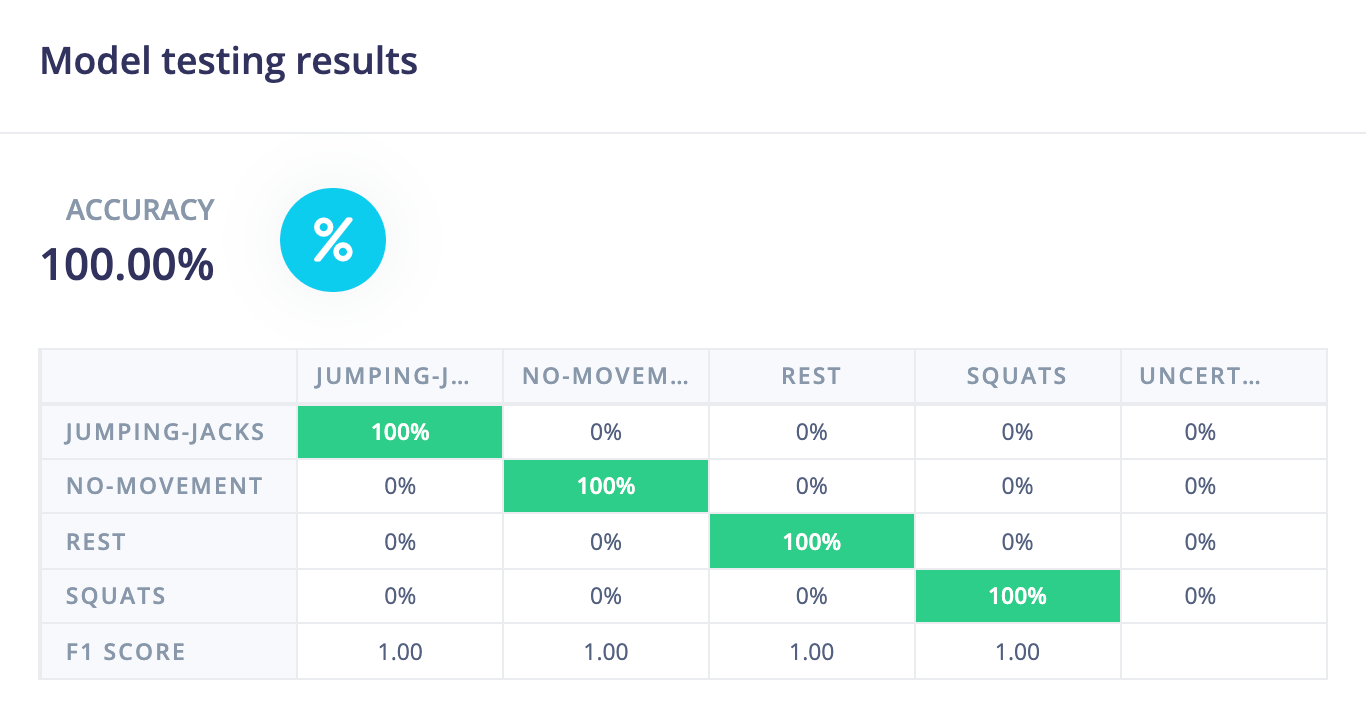
When satisfied with your model architecture, you can then navigate to the model testing web page to test your model on your testing dataset. This model obtained a 100% accuracy on the testing dataset!
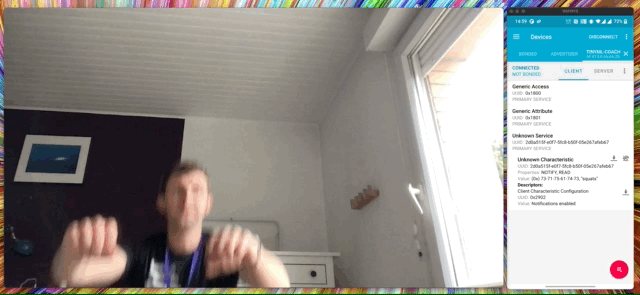
Running the inference on the target
Edge Impulse offers several options to download your model, from ready-to-use firmwares deployable on our natively supported targets to the full C++ library to let you integrate it with your custom application. When inferring on the hardware, no internet connection is required, the inference is performed locally. In this tutorial, we sent the inference results over Bluetooth Low Energy so users can retrieve them directly on their phones.
This project is public on Edge Impulse Studio, so feel free to have a deeper look, clone the project and try it on your side.