
For object detection projects, labeling your images with their corresponding bounding boxes and names is a tedious and time-consuming task, often requiring a human to label each image by hand. The Edge Impulse Studio has already dramatically decreased the amount of time it takes to get from raw images to a fully labeled dataset with the Data Acquisition Labeling Queue feature directly in your web browser. To make this process even faster, today the Edge Impulse Studio is getting a new feature: AI-Assisted Labeling.
To get started, create a “Classify multiple objects” images project via the Edge Impulse Studio new project wizard or open your existing object detection project. Upload your object detection images to your Edge Impulse project’s training and testing sets. Then, from the Data Acquisition tab, select “Labeling queue.”
1. Using YOLOv5
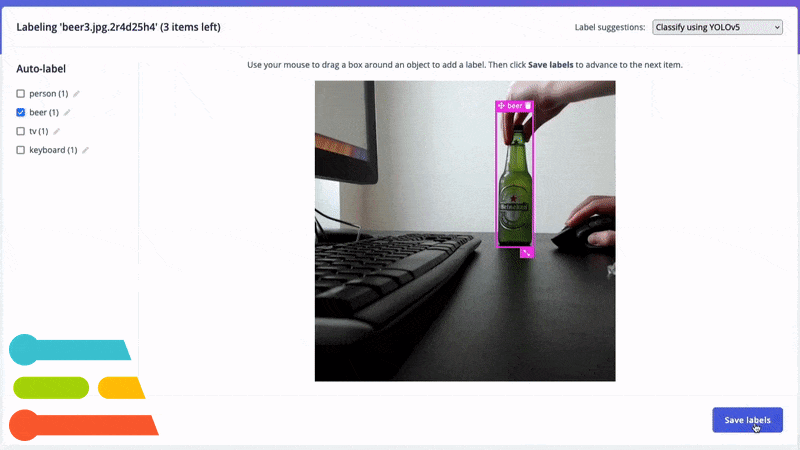
By utilizing an existing library of pre-trained object detection models from YOLOv5 (trained with the COCO dataset), common objects in your images can quickly be identified and labeled in seconds without needing to write any code!
To label your objects with YOLOv5 classification, click the Label suggestions dropdown and select “Classify using YOLOv5.” If your object is more specific than what is auto-labeled by YOLOv5, e.g. “coffee” instead of the generic “cup” class, you can modify the auto-labels to the left of your image. These modifications will automatically apply to future images in your labeling queue.
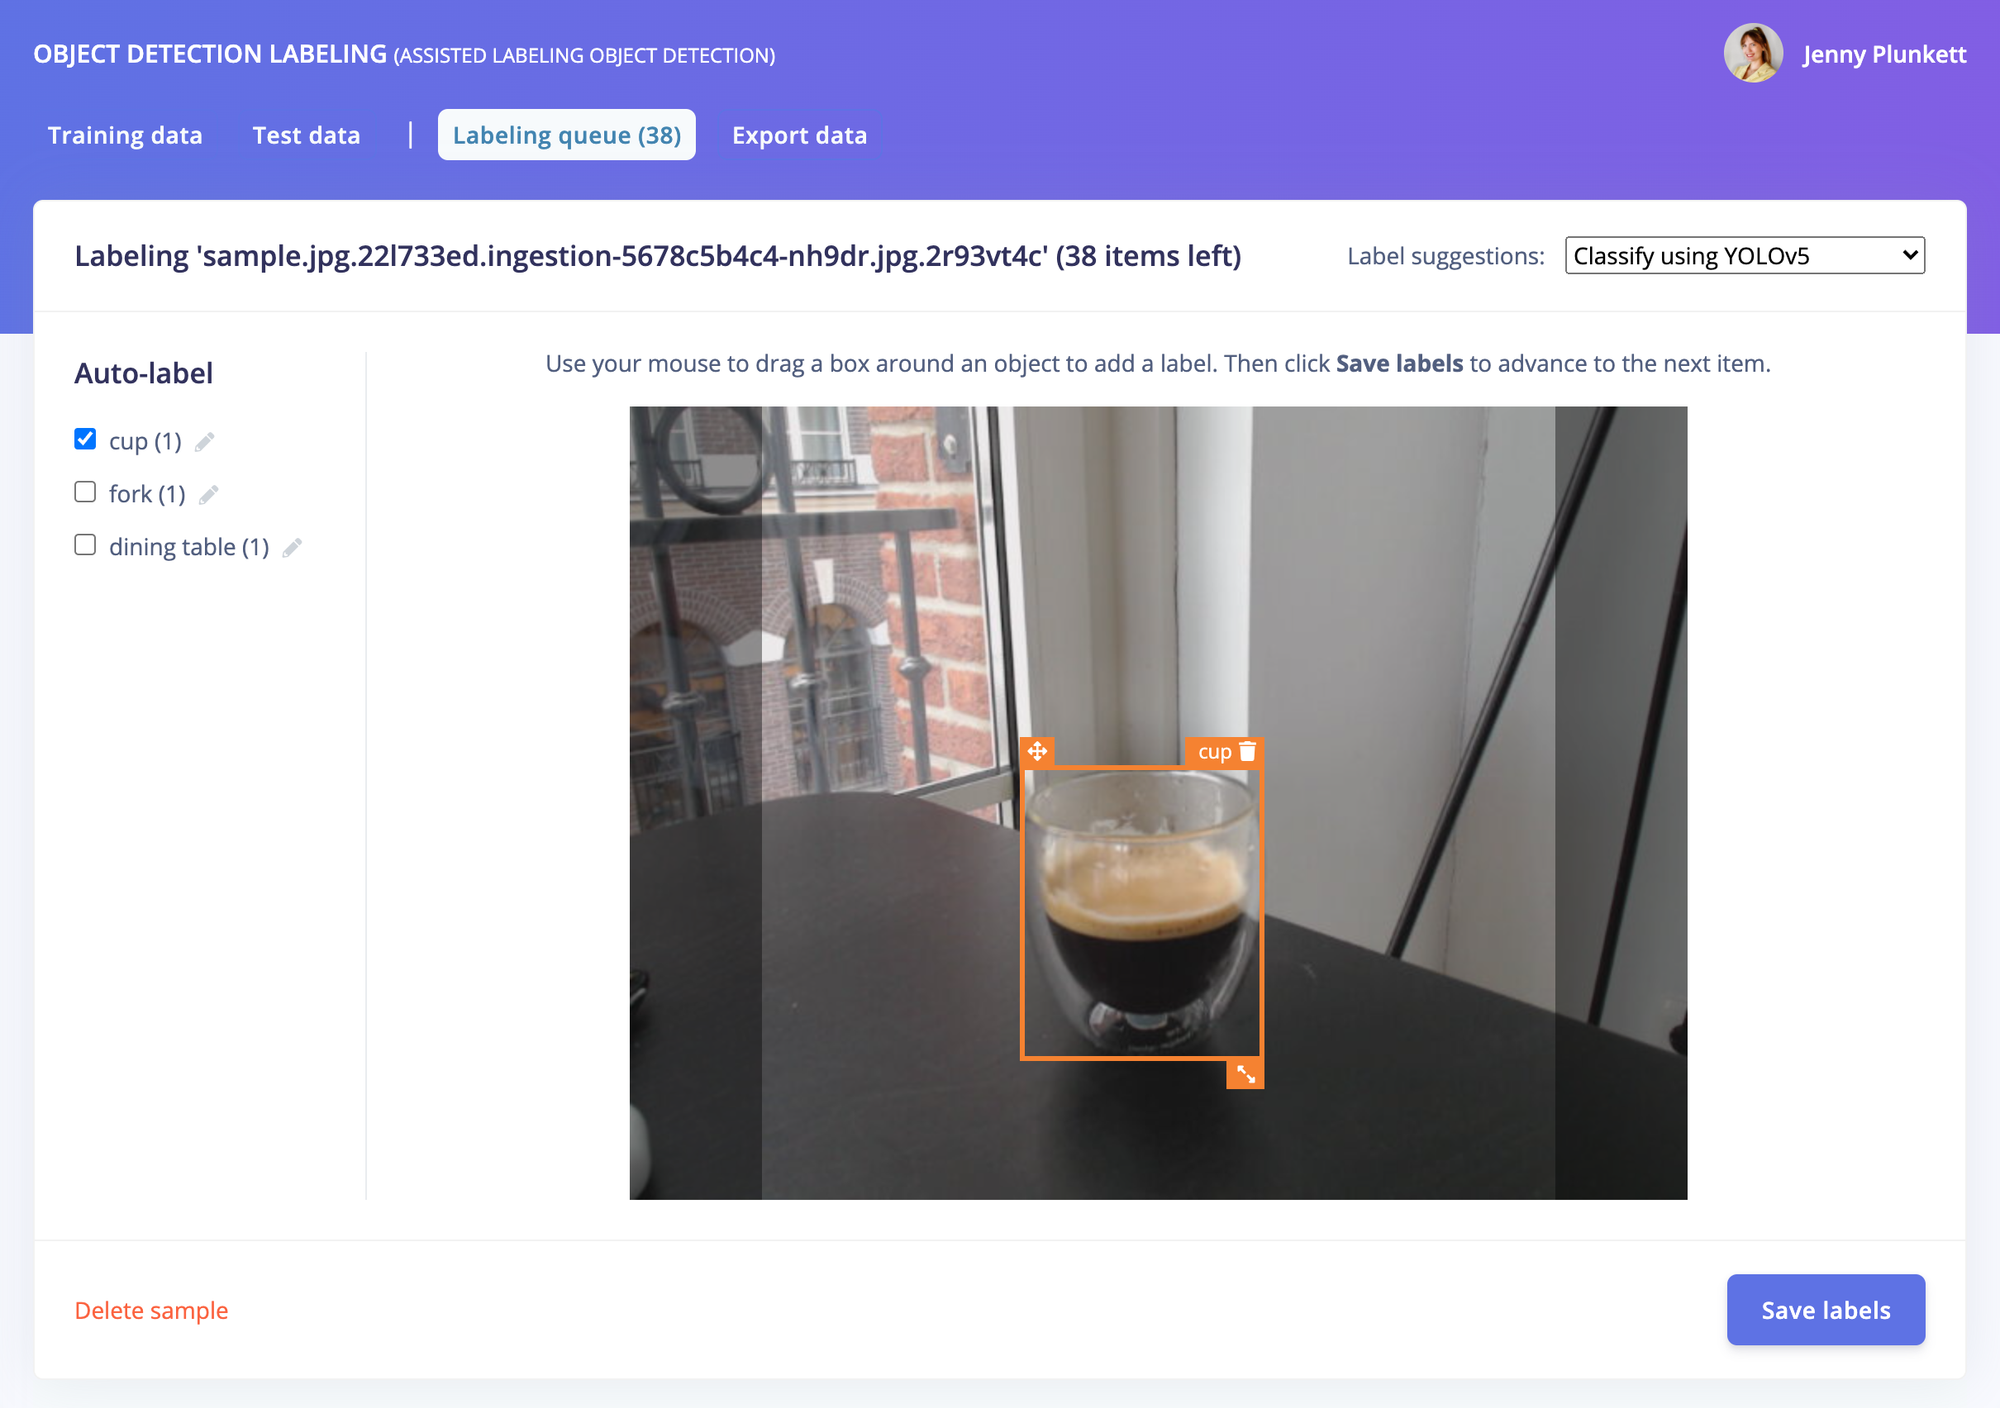
Click Save labels to move on to your next raw image, and see your fully labeled dataset ready for training in minutes!
2. Using your own model
You can also use your own trained model to predict and label your new images. From an existing (trained) Edge Impulse object detection project, upload new unlabeled images from the Data Acquisition tab. Then, from the “Labeling queue”, click the Label suggestions dropdown and select “Classify using <your project name>”:
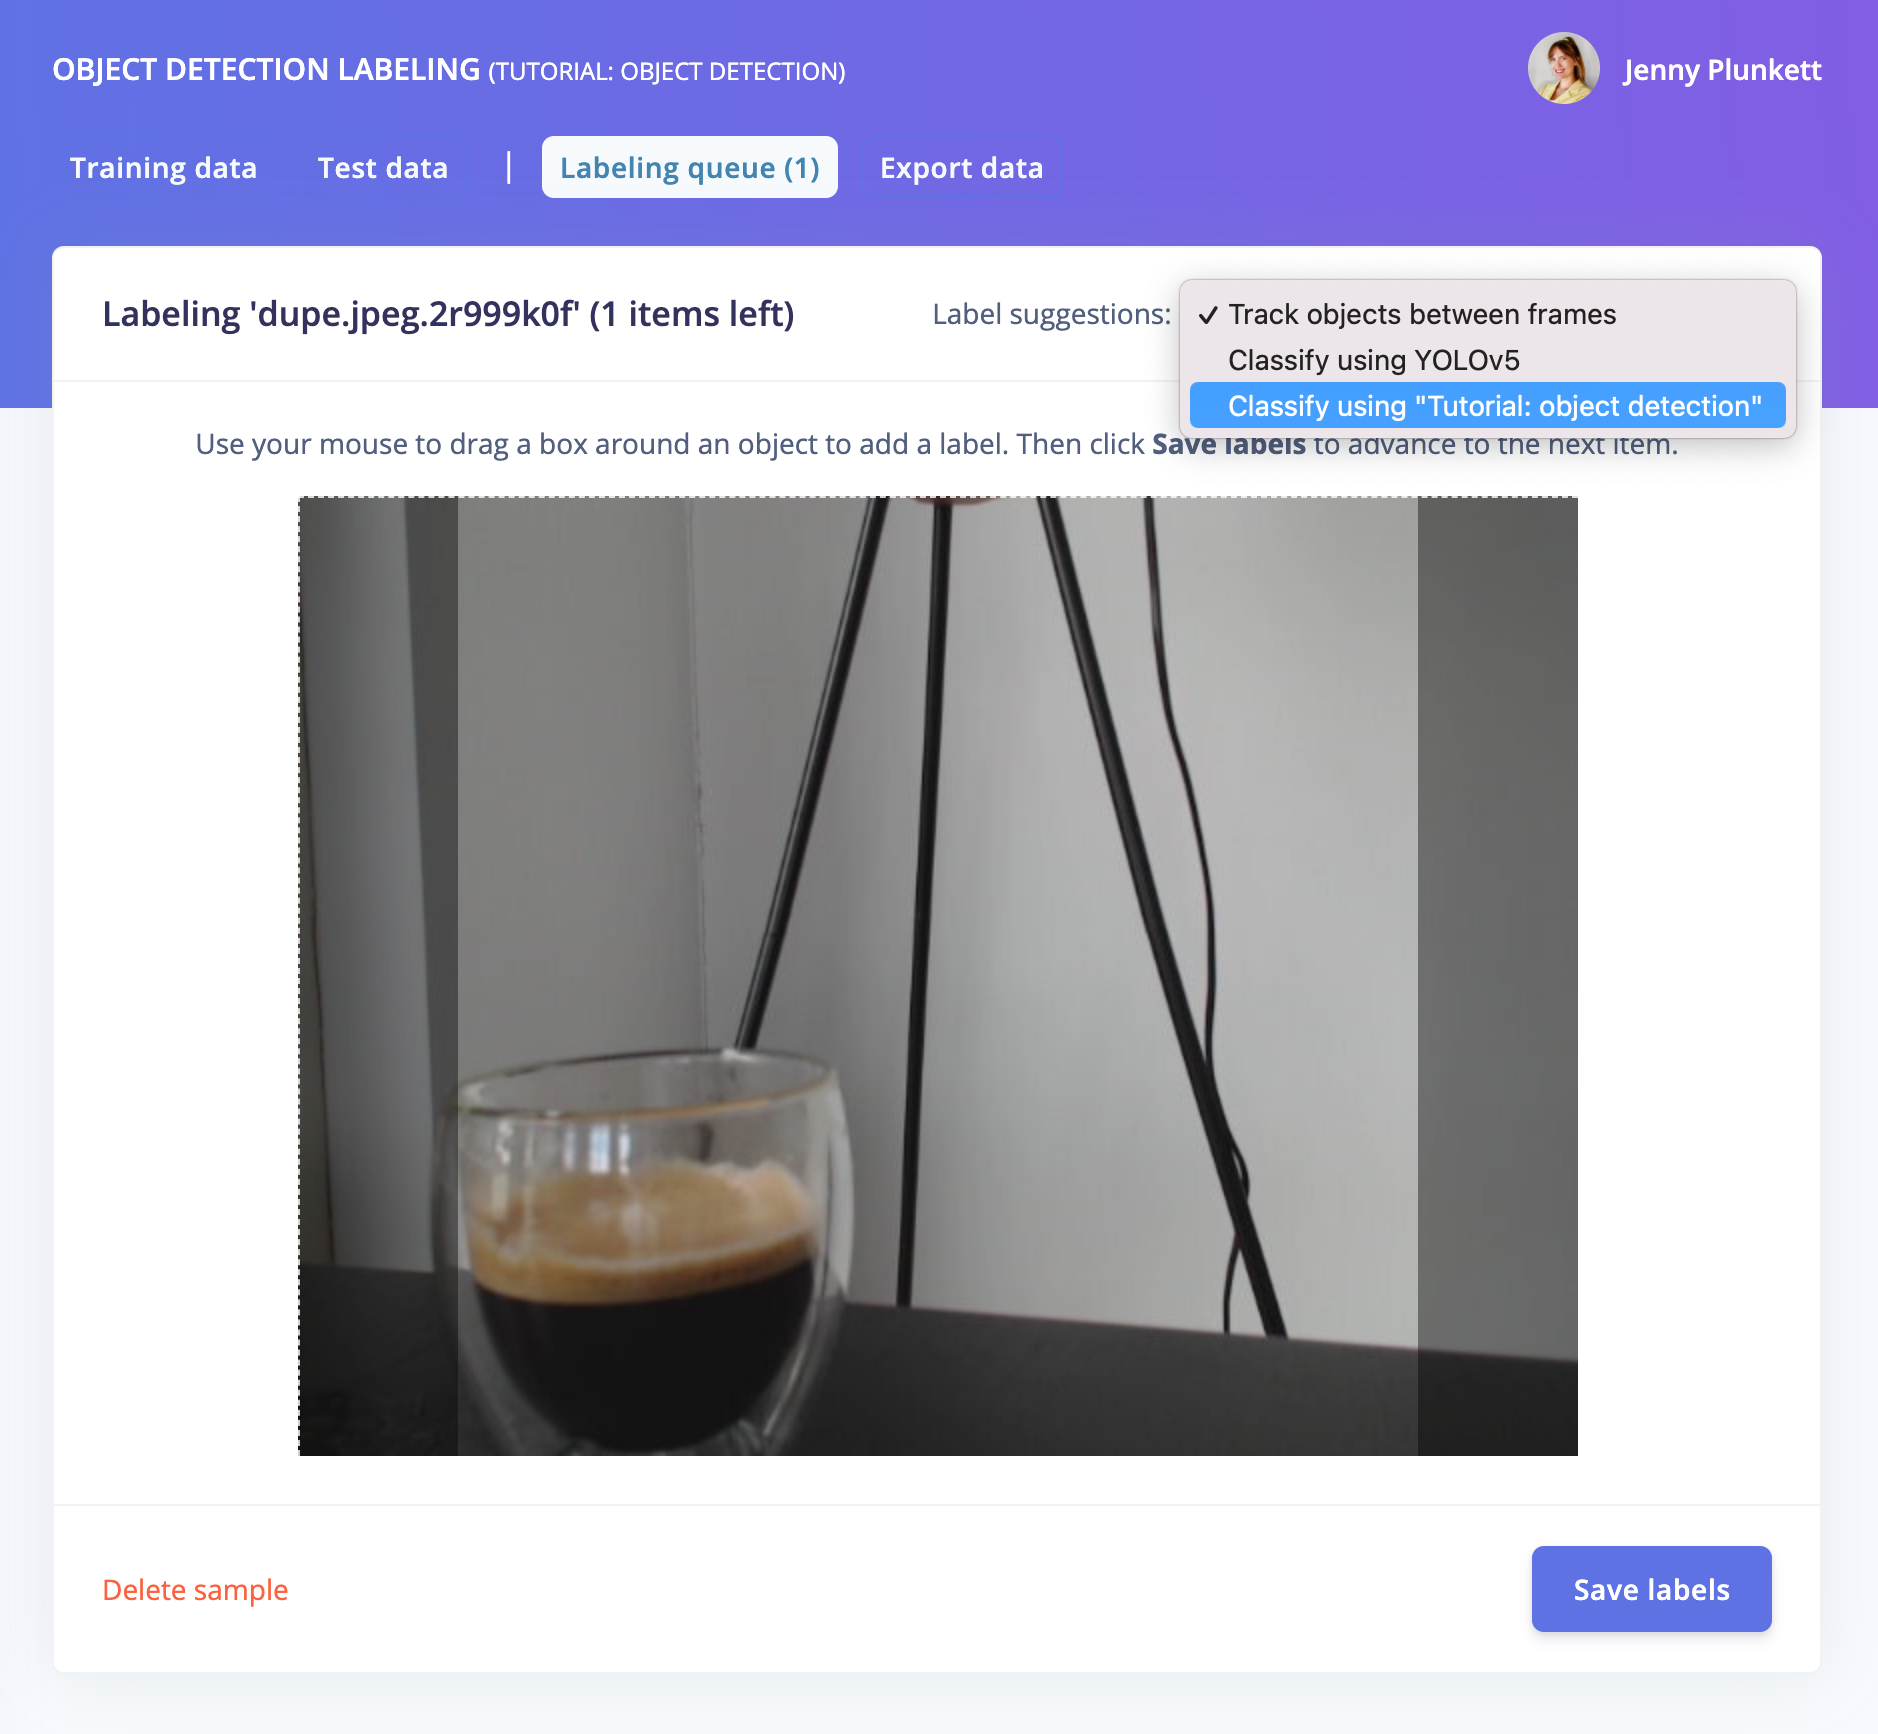
You can also upload a few samples to a new object detection project, train a model, then upload more samples to the Data Acquisition tab and use the AI-Assisted Labeling feature for the rest of your dataset. Classifying using your own trained model is especially useful for objects that are not in YOLOv5, such as industrial objects, etc.
Click Save labels to move on to your next raw image, and see your fully labeled dataset ready for training in minutes using your own pre-trained model!
3. Using object tracking
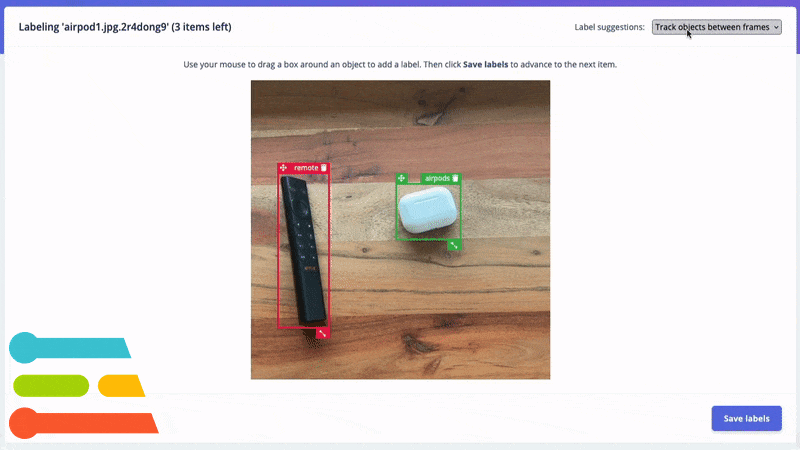
If you have objects that are a similar size or common between images, you can also track your objects between frames within the Edge Impulse Labeling Queue, reducing the amount of time needed to re-label and re-draw bounding boxes over your entire dataset.
Draw your bounding boxes and label your images, then, after clicking Save labels, the objects will be tracked from frame to frame:
Now that your object detection project contains a fully labeled dataset, learn how to train and deploy your model to your edge device: check out our tutorial!
We are excited to see what you build with the AI-Assisted Labeling feature in Edge Impulse, please post your project on our forum or tag us on social media, @Edge Impulse!